Eastern Tn logging on the DG CC & W RR 1928

Bill Nelson

Well-Known Member
Dec 14, 2008
2,680
467
78
Clarksville Tn
Tom,


Yes and no! they are old, MDC 3 pack cars that surfaced shortly before I started my rebuild. I painted them up for the C&S , thinking to use them as interchange cars, to get logs off of the Southern interchange, as back in the day, I was heavy on the sawmill side of the picture, and short on the logging camp side of the picture, and your outfit was exactly the opposite. Likely that is how they will eventually be used, when I get my Southern Staging in, and get enough operational log cars to work the new layout with more camps, and bigger log trains. So they are old, and they are C&S cars, but they are not OLD C&S cars. I do have some old C&S cars in boxes, and those will come out, as I have more track available to park log cars.


I have almost all of the track in on the upper deck, and will be needing to decide what to do next, Get the Southern staging in, and get interchange action going, or do the lower deck to the return loop, and get the big logging camp @ flea Creek , and the Iron Works in. decisions , decisions.

started a creek bed in front of the loading area, down a steep ravine, but I'm getting an error when I try to upload a photo, so I'll try again.


Nelson
 
Last edited:

Bill Nelson

Well-Known Member
Dec 14, 2008
2,680
467
78
Clarksville Tn
OK, things won't load from Chrome on this Mac, but they will from firefox. I just had to find my pass

word

A44a 7-29-16.jpg

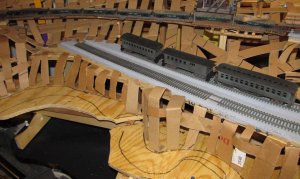
I built in some scraps of plywood to make a small stream at the bottom of a steep ravine, to make the scenery in front of the log reload more interesting


A44a 7-28-16  glue  on  carboard  wickerwork.   .jpg

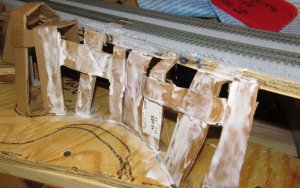
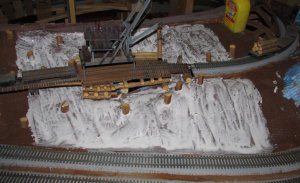
Then I painted the cardboard with white glue, and pressed some handi wipes into the white glue


A44a 7-29-16 Handi-wipes #1.jpg

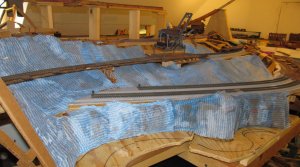
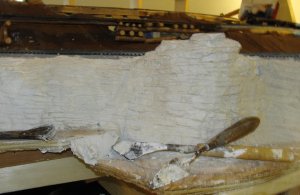
After the handi wipes were in place I painted them with watered down white glue to stiffen them up some. before putting down the first bit of plaster I wanted to get a little bit of land form in closer to the aisle, but was in a hurry. I tried hot gluing the handi wipes to the cardboard, and that went pretty quickly. I did not have to wait for glue to dry , but sprayed
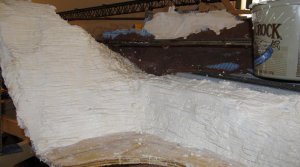
hem with a water bottle to get them damp and slathered plaster where I'm going to carve rocks. elsewhere i painted the handi wipes with brown acrylic paint.


A44a 8-1-16  carving  rocks.jpg

On other fronts I have been working on some old time boxcars I picked up in a trade. I reworked another four, for a total of seven new cars

The seven cars to the left are fresh out of the shops, the two to the right have been in continual service since the mid 1960s.


Nelson

A44a 8-1-16 7 new  boxcars!!.jpg
 

Bill Nelson

Well-Known Member
Dec 14, 2008
2,680
467
78
Clarksville Tn
Tom the primary color there is Krylon Camouflage tan. the stuff is nice, as it is super flat . I dusted it with a little gray primer. the lettering is done with artists white charcoal pencils fro Hobby lobby.
 

Bill Nelson

Well-Known Member
Dec 14, 2008
2,680
467
78
Clarksville Tn
before painting it with the tan It got a solid coat of flat black, inside and out, to kill any plastic translucency , and to put some shadows in between the boards.
 

Bill Nelson

Well-Known Member
Dec 14, 2008
2,680
467
78
Clarksville Tn
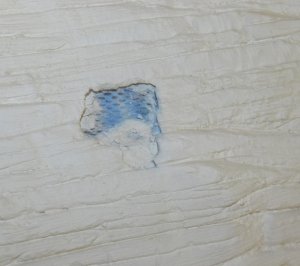
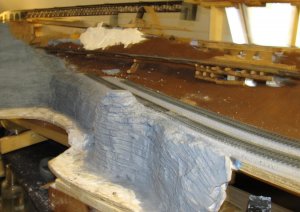
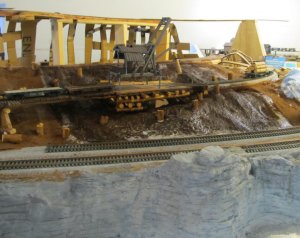
I got a little more rock carved on the inside face of the ravine that will run in front of the log loading scene to make things more interesting. I had one spot on the rock I carved earlier, where I had carved a tad too deep, and hit the handi-wipes. I made the hole a little larger, pushed the handi-wipes in at that location to make a little pocket. sprayed the pocket and the surrounding area with water from a squirt bottle, and then filled the pocket with hydrocal, carving it as it set. then I carved the rocks in the rest of the inside wall of the ravine. I'm wanting to paint this right now, but, I'll get much better results if I let it set up really hard, and then five it a final scrub with a wire brush.


A44a 8-3-16 hole in  carved  rock..jpg


A44a 8-3-16a carved  rocks..jpg
 

Bill Nelson

Well-Known Member
Dec 14, 2008
2,680
467
78
Clarksville Tn
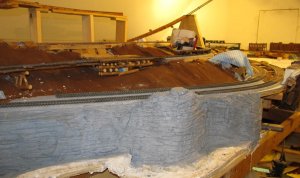
I got back up to the RR room later after my yard work got rained out, and painted my new rocks

A44a 8-3-16 rocks #1.jpg


A44a 8-3-16 rocks #2.jpg


at the base of these cliffs will be a small meandering streams. in places in the front there will be the other side of the ravine, hopefully making a some interesting scenes.
 

Doctor G

Well-Known Member
Sep 1, 2008
1,415
298
78
Clarksville, Tennessee
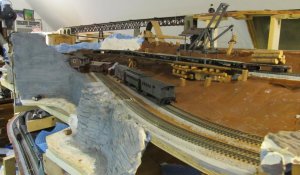
Your rock carving is always amazing. The rock facings are big with incredible detail work at the same time. The 3D effect you are getting on this new scene is very nice. I really like the long lines of the rock work, the log loading site ,the long bridge, and foreground tracks. Nothing seems "cramped" at all.:Congrats:

Doc Tom
 

Bill Nelson

Well-Known Member
Dec 14, 2008
2,680
467
78
Clarksville Tn
Thanks Tom, with two tracks for the tail track for the wye. a track for loading log cars ( I had planned a second to hold empties- but had wanted to run it over the tail tracks on a trestle. I just did not have enough vertical clearance to make it happen. I wanted those tail tracks to be relatively close to level. If I raised the log loading track high enough for the clearance. then I'd have to raise the narrow gauge as well. If I raised the narrow gauge then the track level on that narrow gauge spur would be close to the narrow gauge main (way too high), and the second long bridge over the wye would make no sense). so the empty track at the landing got deleted. helping keep this area a tad less cluttered. While there is a lot going on at this end of the peninsula, it is about five feet wide right here, and the ridge will make it so you can see just about half of what is going on at the cross section. It was a much greater challenge at the other end of the peninsula where it is just over two feet wide, and has the passing siding off the helix, the passing siding off the wye, and the narrow gauge main, and the switch beginning the narrow gauge spur to the log reload. That could not have worked without going split level, putting a back drop behind the passing siding off the helix. The Narrow gauge is ridiculously high by then, essentially another level. There is going to be some near vertical scenery there. My next push will be be to get the track down on the sidings to the water powered sawmill, and to start doing some basic scenery there. I will be trying to channel the old gizzard starting at the sawmill, and extending over toward the wye, which means I'm going to be trying to fit some structures into that nearly vertical scenery. A side effort will be to build the benchwork for the shelf over State line, which will be super stout. That Southern wall is attached to the old house wall, and thus is super stout. on the upper end of the narrow gauge, I have shifted from half inch subroadbed to three quarter inch subroadbed the walkunder between the shelf above Stateline (currently unnamed ) will be roughly triangular about six inches wide On the central peninsula side. and widen to two feet or so on the other side. I'm going to cut it out of a single 4x8, so Hopefully the triangular support will help stabilize the central peninsula, which is a tad wobbly compared to the old one.
 

Bill Nelson

Well-Known Member
Dec 14, 2008
2,680
467
78
Clarksville Tn
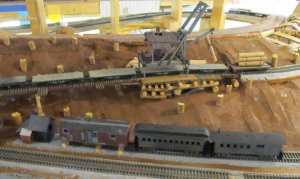
I did some cleaning up of plaster debris around the log reload. installed more handi-wipes ( with hot glue this time, because I was in a hurry), and then painted it brown, and touched up where the plaster had got on the earlier brown. then I used hot glue to add some more cribbing under the loader deck, and added some stumps. I experimented with some building locations. I have not found the box with most of the logging camp structures. it may still be in the attic.


a44a 8-4-16 log transfer  3a.jpg


a44a 8-4-16 log transfer  3b.jpg


this is a lot of fun. progress will get slower. I have to go to school tomorrow and help het ready for the next school year.
 

Bill Nelson

Well-Known Member
Dec 14, 2008
2,680
467
78
Clarksville Tn
Getting ready to play with ground cover, after my first day back at work after the summer break, getting training, , doing some planning, and helping the teachers get our class rooms ready for the kids.

This is a big scene, and as you know ground foam is not cheap. It was time to get out the blender. sadly It took me way too long to find it. I know where everything was two years ago when I tore up my old central peninsula. For years Dr. Tom and I have been running natural materials through the blender NOTE . . . . . . . . ( use a dedicated blender, either buy a cheap blender for use in the hobby room, or buy the cooking spouse a nicer blender, and appropriate the old one. Once you have used the blender for the preparation of scenery materials, it is no longer suitable for food preparation use)!

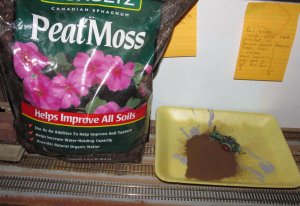
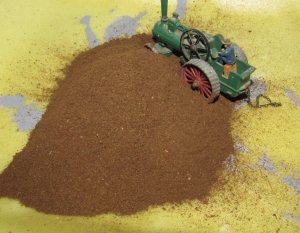
any number of items can go into the blender, but one of my favorites for producing a forest floor material is peat moss from the gardening center. I put it in the blender and run it for a longer time if I'm wanting a more dirt like material, and for a lesser period of time if I'm looking for a debris strewn forrest floor. After I run the blender with the lid tightly on it. I let is set for 15-20 minutes to let the dust settle, and there is a ton of dust.

A44a 8-5-16 peatmoss a.jpg
In the photo above I have the bag of peatmoss from the garden center, and a tray with the stuff ground up on a meat tray, with Crazy Ed driving his team tractor though it for scale, reference. When glued down with white glue it is darkened somewhat, making a great multi textured dirt material.


Nelson
a44a 8-5-16 peatmoss #2.jpg
 
  • Like
Reactions: OldMiner

Bill Nelson

Well-Known Member
Dec 14, 2008
2,680
467
78
Clarksville Tn
First full day of school, after collapsing for a while , I got up to the RR room. I did some work around the log loading area, painting the hadi-wipe ground with white glue, spreading ground peat moss on it, and the spraying it down with wet water, it will need more work later, but I'm starting to get some ground down in this area. the glue, and the peatmoss will make this ground a lot stronger..

A44a 8-10-16 glue  @  landing #1.jpg


A44a 8-10-16 peatmoss  at  loader a.jpg


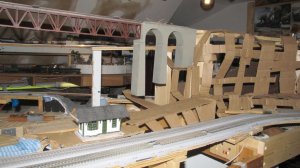
Then I got over to the end of the back aisle, and worked on some lad forms. this area has some challenges, as the whole peninsula is only 28 inches wide at this spot, and there is a passing siding on the main on the front aisle, and the back aisle, with two narrow gauge tracks between them, way high. to get an idea of how skinny this scene is , I am including a photo of the same area on the lower level

.A44a 8-10-16. narrow  spot  on lower  level.jpg


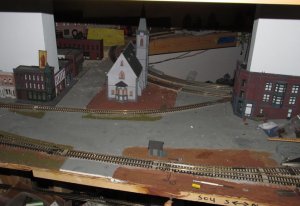
to the right at the end of the aisle I have my water powered sawmill which I scratchbuilt in the late 1090s, when I was still in college. it is going to set in a deep valley, formed by the narrow gauge main. I want to have the sawmill scene connected to the rest of the scene, so I have put a road on the cliff, running down from the narrow gauge roadbed. To make things interesting the road is elevated above the railroad tracks, and Likely I'll put some log cribbing in to support the road. In the main area of the central peninsula, there will be a small town, with some of my nice structures to fill in , especially St. Joseph's from the old Gizzard.A44a 8-10-16 red  river  bridge  a1.jpg
the road starting off from the area of the station @ Perry's Gizzard, and then continuing into the area of the sawmill.


A44a 8-10-16 Gizzard road #2.jpg
 

Bill Nelson

Well-Known Member
Dec 14, 2008
2,680
467
78
Clarksville Tn
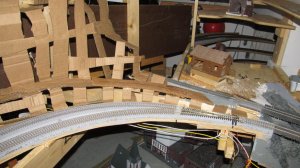
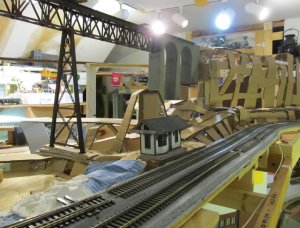
It is the weekend weekend! I survived a week working at school; was totally exhausted, and had to take a nap when I first got home, but I recovered and was up in the RR room some while i was cooking dinner. Messing with cardboard land forms, creeping some scenic forms into the deep gorge of the south fork of Crooked Creek through Perry's Gizzard. I'm wanting to have some of the chimney rock formations in the new Gizzard, reminiscent of the ones in the old gizzard. I'm also going to want to place several buildings, to suggest a small mountain community along the streams. as the land forms go in, this is getting increasingly tricky. while the entire space of the gizzard is larger than the old gizard, the topology is even more twisted up, if such a thing is even possible. it is a lot of fun. I did some more work with the cardboard strips in the gizzard. this is slow going, as I'm working around some of the joint between sections of benchwork, and I'm trying to set up the scenery so that cardboard and the handi wipes don't cross between benchwork sections. hopefully If I ever disassemble this, the scenery will seperate more easily at the edges of the benchwork sections.


I have the first of the two steel bents in the right place. still working on the shape for the land forms. I really like what is there, but may want to re do it, to facilitate building locations. I want to put a couple stores in there, St. Joseph's from the old Gizzard, and possibly the Wonderland Hotel from Dr. Tom's old layout.


a44a 8-13-16 the  gizzard  station.a1.jpg
 

Bill Nelson

Well-Known Member
Dec 14, 2008
2,680
467
78
Clarksville Tn
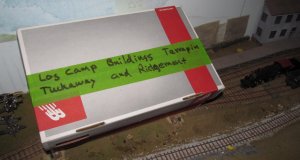
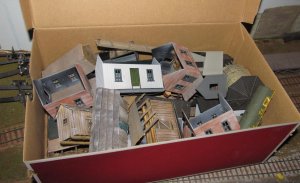
as I had started to get some ground down at the log reload camp, I started looking for the box of log camp buildings. It took me a long time to find them; but i finally did. they were in a storage area under the lowest level of the central peninsula. this area is only about a foot tall, and I thought that only lumber scraps were down there. this box had stuff from the logging camp at Terrapin, TN., The log Reload fat Ridgemont, and the logging camp at Tuckaway, which split the difference between a logging camp, and logging staging. Some of these buildings are survivors form Dr. Tom's old C&S. I'm playing with possible locations at this time. Most likely most of the skid shacks will end up in Flea Creek, which will be more of a temporary camp, and the log transfer, which is called Sunburst, at least for now, will have some more permanant cabins, and buildings made from old car bodies.

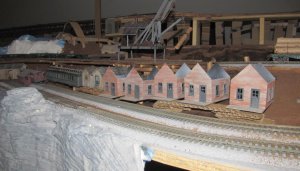
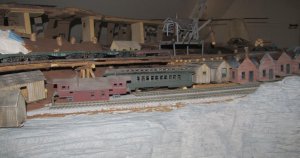
as I have been trying to do building placement in the Gizzard, I've run into lots of challenges. I think I did find a good location for Tom's partly done Wonderland Hotel building, off the tail track to the Wye. the weekend before last , I was working on some grant Line Reese St. houses, and was missing parts for one of the lean-to . that mystery is solved, I found it attached to another kitbashed structure. one or two of the Rese Street structures may end up in this scene. they are larger and fancier than the red cabins, and may be housing for the station agent, and the landing forman.

A44a 8-16-16 camp  buildings  found #1 .jpg

A44a 8-16-16 camp buildings  found #2#.jpg


A44a 8-16-16 camp buildings  found #3a.jpg


A44a 8-16-16 camp buildings  found #4a.jpg


Nelson
 

Bill Nelson

Well-Known Member
Dec 14, 2008
2,680
467
78
Clarksville Tn
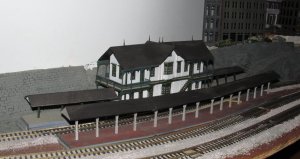
Have done some cleaning up of construction debris down in Harlow. it still needs some careful vacuuming. although I have massive scenery work to do on the top level, that won't be as messy as the carpentry (God Willing), also Much of it can be put off for a time. I may start digging out some of the rest of the railroad so I can run some trains, or possibly work on various small projects spread around the whole system while I consider which of the remaining unstarted areas to start on next.

Currently the huge narrow gauge Gizzard high Bridge, isn't hooked up to anything. One really fun project would be to build the 15 foot shelf to carry the narrow gauge across the eastern sloped ceiling to the Helix nook area, and then build the fourth level shelf to go on the south wall above state line . Then all that would remain is about a six foot shelf on the west sloped ceiling to tie all of the roadbed together for the narrow gauge system. the mainline track will be very simple between the ore transfer area in the Ridgemont TN. /State Line GA. area, and the shelf up above the State line shelf, where there will be a passing siding and an iron ore mine and a coal mine, with only a single switch leading down to the log reload area.

another area that will have big operational benefits would be working on the Southern staging, under Harlow. The Southern Main in harlow makes a return loop, and I want to put a similar return loop in Southern staging. with three tracks on one side of the peninsula, and two or three on the other, That way, southern passenger and freight trains could come and go through Harlow. Some could be through trains, and some could drop off or pick up cuts of cars. When I get that operational, my railroad's operations will be more interesting than they have ever been.

or I could extend the main line onto the central peninsula's lowest level. there will be three areas down there of great interest., Flea Creek, a very large logging camp, which will be a lot of fun to set up; Montgomery Furnace, where I will put in The Montgomery Iron Works, a much expanded version of the old montgomery furnace; and a town to support it. Last of all, there will be Terrapin, a return loop, with a passing siding as long as the return loop, which will be able to be used as a passing siding, and as Staging representing the semi Mythical Dead Grass, which hasn't been on the layout in the last 44 years!

Nelson.


A44a 8-18-16 Harlow Station.jpg
A44a 8-18-16 Harlow Station Steps.jpg
 

Doctor G

Well-Known Member
Sep 1, 2008
1,415
298
78
Clarksville, Tennessee
Good to see some of those old C&S logging shacks being put to use. I used your white glue layer first scenery technique today to put in a gravel yard around the RJ Corman engine house at the club today. This was followed by sprinkiling on the gravel and soaking the beejeebers out of all of it with "wet water." The glue came up by capillary action just as advertised. Seeing the photo of the hillside smothered in Elmer's white reminded me of it all. I will post some pictures on the club thread later after the glue dries.

Soaking everything wiped out the paper engine house sign and this will need to be replaced.:violin:Oh well live and learn.:hammerhead: Tom
 

Bill Nelson

Well-Known Member
Dec 14, 2008
2,680
467
78
Clarksville Tn
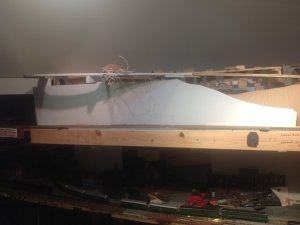
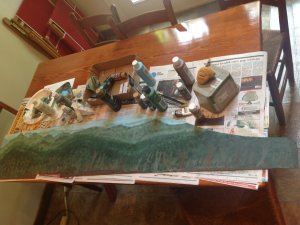
I'm working on this back drop, behind the passing siding off the helix nook on the upper deck of the central peninsula.


image.jpeg


image.jpeg

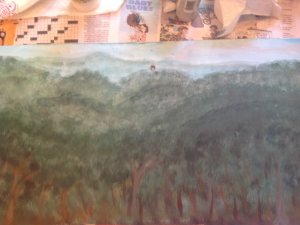
Here I have painted on top of the sky blue latex house paint on the Masonite with diluted acrylics, going for a look similar to the looseness I can get with water colors. Here is a detail shot.image.jpeg

This was a lot of fun! I think it will look real good, This will be one of the first things you see when you walk into the room. I think this will help establish the mountain railroad feel.