2001 ASO USSC Discovery One
- Thread starter DanBKing
- Start date
You are using an out of date browser. It may not display this or other websites correctly.
You should upgrade or use an alternative browser.
You should upgrade or use an alternative browser.
It is so good to know that you are calming down but, well, let me say, I don't want to pour more oil into the fire, but... this is what I had done:
Building the inner rings without tabs completely.
Assembling the inner rings to make the inner side of the dish.
Then assembling the outer rings separately and attaching them without tabs to get the outer side of the dish.
Aligning the two halves and glueing them together.
Peut-être this could have saved you much trouble. Reason for my idea is, you'll end up with a series of concave / convex rings which have to be simply stacked together. In addition, you could have saved the water-shaping.

(And I know exactly what you are thinking right now! )
)
Building the inner rings without tabs completely.
Assembling the inner rings to make the inner side of the dish.
Then assembling the outer rings separately and attaching them without tabs to get the outer side of the dish.
Aligning the two halves and glueing them together.
Peut-être this could have saved you much trouble. Reason for my idea is, you'll end up with a series of concave / convex rings which have to be simply stacked together. In addition, you could have saved the water-shaping.
(And I know exactly what you are thinking right now!
(And I know exactly what you are thinking right now!)
Good!
I for 1, am NOT going to do it again, in any way or form..... :Nonoooo: and besides the fact that I still have the two small dishes to do yet too....!
I'm gonna PM you the parts sheet now ...............

Have fun with it R-F !!!

(Lemme know when you have completed it and I'll send you my snail-mail address ............
 )
)
Last edited:
- Apr 5, 2013
- 13,499
- 9,550
- 228
Do cut off all tabs. Apply strips on the backside to hold the parts together. They will not be on the same plane, and that will make the parts fall into place. Perfection cannot be reached on this plane of existence, but damn, you're close!! 
But in all seriousness, I am open to learning better methods.
@Revell-Fan I would really like to see your technique in practice. If I can better what I have done, using a different methodology, then so much the better for the outcome..... But getting the textures accurately lined up, with all other factors considered, I did not find easy, in both ways I tried.
Here's a deal: If you can pull it off, I will build another one using your technique.

@zathros I sometimes wonder which plane of existence I am on half of the time ....
@Revell-Fan I would really like to see your technique in practice. If I can better what I have done, using a different methodology, then so much the better for the outcome..... But getting the textures accurately lined up, with all other factors considered, I did not find easy, in both ways I tried.
Here's a deal: If you can pull it off, I will build another one using your technique.
@zathros I sometimes wonder which plane of existence I am on half of the time ....

OK, pal!
You are brave!
But, I have no doubt at all in your abilities.
These are the points that I have been trying to achieve :-
- All radial textures must be accurately aligned. Not only on the inner and the outer surfaces, but also in relation to each other.
- Joints between the rings must be seamless and clean.
- Final structure needs to be a smooth, rounded dish with no obvious transition between the rings.
- A 'clean' build!
Here are some inspirational photos, that I am using for reference.....
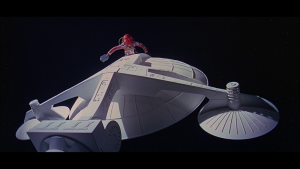
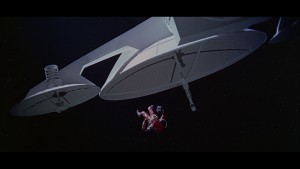
Also, to give you a hint where I am going further with this part of the build ....
In the following pics is a test build of the frame piece. Compare the piece to the structure of the frame in the photos above. Rather lacking in my opinion ......
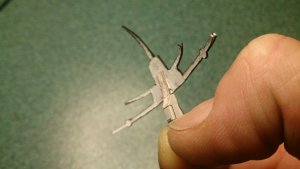
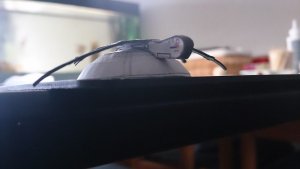
So, I'm busy enhancing the frame.......

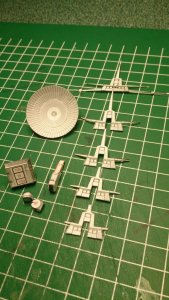
I'll explain in more detail soon ......

OK. I have printed the parts and see what I can do.
Good luck! I'll be watching ......
Attempt #1:
I cut out the single parts using a nail scissor. Then I scraped the remaining black outline off with the sharp edge of my cutter. I edge-glued the single circles together and then edge-glued the three circle elements to get the inner and outer half of the dish.
Then I test-fitted if everything fits together. Unfortunately the glue wasn't dry on one of the halves yet so the halves sticked together like hell. It took me five minutes to separate the pieces again; fortunately without causing any damage.
Last I glued the halves together and smoothed them by putting them on the carpet and rolling and pressing the grip of my sciccors into the inside of the dish.
And this is my result:
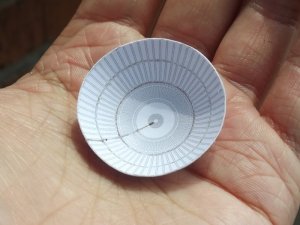
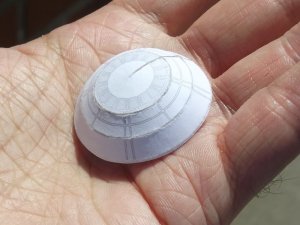
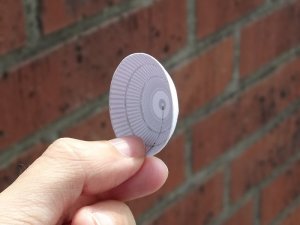
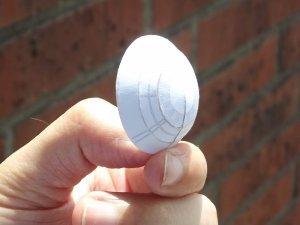
My conclusions:
1. The camera does not lie. :explode:
2. Yours looks better.
3. I had no big problems aligning the pieces. I used the seams as guide lines.
4. No big fitting issues; I work with 160 gsm paper.
5. That black outline is really a pain... I wish it wasn't so thick.
6. I won't give up and make a few more attempts.
7. I'm looking forward to your updates.
 rinks:
I cut out the single parts using a nail scissor. Then I scraped the remaining black outline off with the sharp edge of my cutter. I edge-glued the single circles together and then edge-glued the three circle elements to get the inner and outer half of the dish.
Then I test-fitted if everything fits together. Unfortunately the glue wasn't dry on one of the halves yet so the halves sticked together like hell. It took me five minutes to separate the pieces again; fortunately without causing any damage.
Last I glued the halves together and smoothed them by putting them on the carpet and rolling and pressing the grip of my sciccors into the inside of the dish.
And this is my result:


My conclusions:
1. The camera does not lie. :explode:
2. Yours looks better.

3. I had no big problems aligning the pieces. I used the seams as guide lines.
4. No big fitting issues; I work with 160 gsm paper.
5. That black outline is really a pain... I wish it wasn't so thick.

6. I won't give up and make a few more attempts.
7. I'm looking forward to your updates.
- Apr 5, 2013
- 13,499
- 9,550
- 228
Vacu-form that piece. It wouldn't be hard, and if you used thick enough plastic (not too thick), and re-enforce the paper dish, you could probably use the paper dish for the form to suck the plastic one into! 
Nice work!!!! Claphands
Yours is a lot cleaner than mine.........thumbsup
And you are right. The black line is a pain in the 4$$.... When you trim it off, the part is then on its limit of tolerance. I found that using sandpaper to remove the last of the black line residue, results in a cleaner, less 'fluffy' joint. I used 400 grit wet&dry. At this scale, any rougher would be too much.
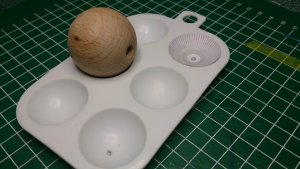
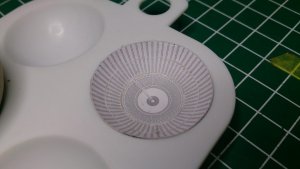
I found that water shaping certainly helps in getting a smoother transition between the rings. I also found something that the dish fitted perfectly into, as a mold/form. I found this out by accident, when I dropped the dish and it landed in the thing........ I am at work at the moment, but when I get home later, I'll post a pic of what I am talking about. I just wish I had found this out before I had finished building the damn dish!!!! My life would of been a little less stressful.

As I have mentioned many times already, it is unbelievable what I have used from my daily household items as jigs or building aids, in one form or another.
I think I am gonna sell everything in my kitchen as 'Discovery Paper Model Building Jigs'.

Yours is a lot cleaner than mine.........thumbsup
And you are right. The black line is a pain in the 4$$.... When you trim it off, the part is then on its limit of tolerance. I found that using sandpaper to remove the last of the black line residue, results in a cleaner, less 'fluffy' joint. I used 400 grit wet&dry. At this scale, any rougher would be too much.
I found that water shaping certainly helps in getting a smoother transition between the rings. I also found something that the dish fitted perfectly into, as a mold/form. I found this out by accident, when I dropped the dish and it landed in the thing........ I am at work at the moment, but when I get home later, I'll post a pic of what I am talking about. I just wish I had found this out before I had finished building the damn dish!!!! My life would of been a little less stressful.


As I have mentioned many times already, it is unbelievable what I have used from my daily household items as jigs or building aids, in one form or another.
I think I am gonna sell everything in my kitchen as 'Discovery Paper Model Building Jigs'.

In post #273, I mentioned that I was enhancing the frame of the antenna array.
The last picture in that post shows that I have cut out 5 versions of the frame pieces.
On each piece, the 3 arms are cut successively shorter. This was done to make the arm thickness reduce towards the edge of the dish.
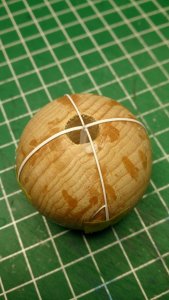
Each piece was successively glued together with the shorter arms at the back (dish side) At each gluing stage the arms were bent to shape over a wooden ball and allowed to dry in this shape. The outer-most frame piece with the arms for the small dishes was not attached at this point.
Once the glue had dried thoroughly, I then soaked the arms in ca glue to give them rigidity and hold their shape.
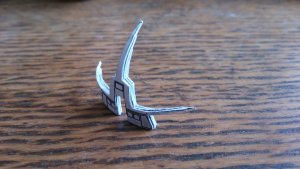
I then attached the upright mounting post. The place where the antenna dish should normally mount to, needed to be built up with strips of paper to accommodate for the extra thickness of the frame. You can see in the second picture that the post is too low in the frame. so, the part, framed in red, was built up to the correct level.
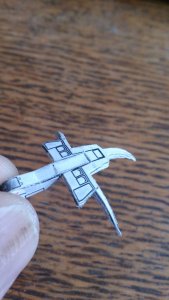
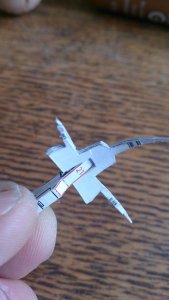
In keeping with studio model, I thickened up the long arms by laminating a few sheets together, up to the thickness of the frame piece. I also added a bit more structure to the arm around the small dishes, that was lacking in the original part.
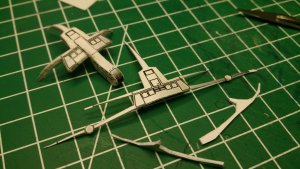
The main frame piece was glued to the thicker part and the arms were also attached. A few places were strengthened with ca glue to keep it all rigid.
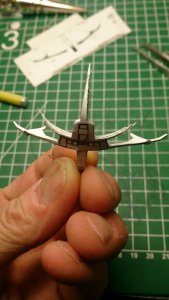
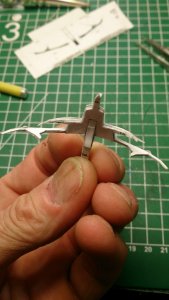
And then, at last, the main dish was attached.
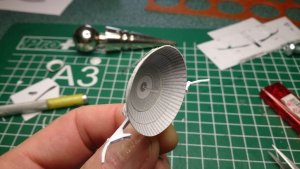
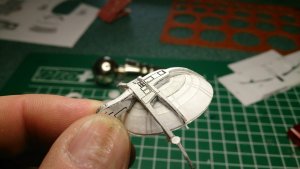
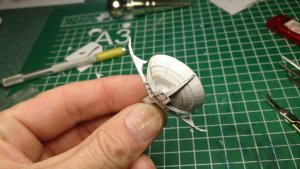
I am going to do a few touch ups with white paint and fix a few other issues yet.
Now, I have to make the two small dishes................
I am really not looking forward to that!!
But, something else for the build is now drying from water-shaping; the support arms for the receiver post. By water shaping I should get a more uniform curve to all the arms...... We will see when it dries.
Back with more soon.

The last picture in that post shows that I have cut out 5 versions of the frame pieces.
On each piece, the 3 arms are cut successively shorter. This was done to make the arm thickness reduce towards the edge of the dish.
Each piece was successively glued together with the shorter arms at the back (dish side) At each gluing stage the arms were bent to shape over a wooden ball and allowed to dry in this shape. The outer-most frame piece with the arms for the small dishes was not attached at this point.
Once the glue had dried thoroughly, I then soaked the arms in ca glue to give them rigidity and hold their shape.

I then attached the upright mounting post. The place where the antenna dish should normally mount to, needed to be built up with strips of paper to accommodate for the extra thickness of the frame. You can see in the second picture that the post is too low in the frame. so, the part, framed in red, was built up to the correct level.


In keeping with studio model, I thickened up the long arms by laminating a few sheets together, up to the thickness of the frame piece. I also added a bit more structure to the arm around the small dishes, that was lacking in the original part.

The main frame piece was glued to the thicker part and the arms were also attached. A few places were strengthened with ca glue to keep it all rigid.


And then, at last, the main dish was attached.


I am going to do a few touch ups with white paint and fix a few other issues yet.
Now, I have to make the two small dishes................
I am really not looking forward to that!!
But, something else for the build is now drying from water-shaping; the support arms for the receiver post. By water shaping I should get a more uniform curve to all the arms...... We will see when it dries.

Back with more soon.

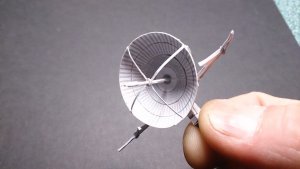
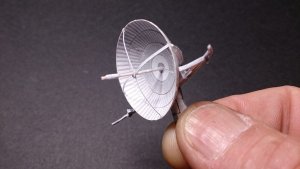
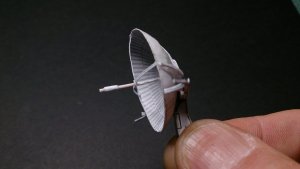
A bit more progress.
The main dish is now complete............ I added the receiver section that was missing from the templates. I made this with a thin wire, with a paper wrap to represent the receiver. This I then stuck to a tiny disc of paper and then this was glued to the top of the receiver supports.
Not too bad, I think ........
Will be back when I can .....

The main dish is now complete............ I added the receiver section that was missing from the templates. I made this with a thin wire, with a paper wrap to represent the receiver. This I then stuck to a tiny disc of paper and then this was glued to the top of the receiver supports.
Not too bad, I think ........


Will be back when I can .....

- Apr 5, 2013
- 13,499
- 9,550
- 228


