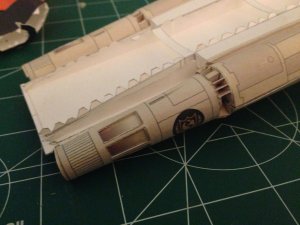
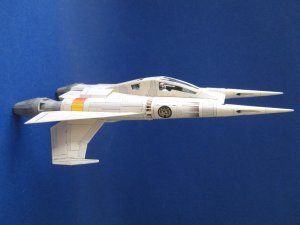
Buck Rogers Thunderfighter built by CrimsonLine, model designed by Martin Saenger

Revell-Fan

Co-Administrator
Staff member
Administrator
Moderator
Aug 1, 2009
11,595
12,338
228
Vreden
Take your time (your model will thank you for that ;) ).

I promise, once you have found out how to do it you would like to do it again and again! :)
 

CrimsonLine

Member
Aug 14, 2014
83
49
23
51
Poughkeepsie, NY
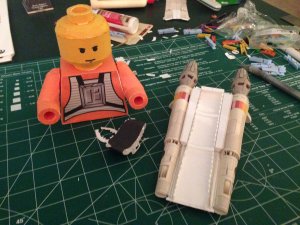
Okay, I came back to the model after a little hiatus, both to clear my mind of the frustration of that danged forward sponson piece, and to start building another model as a present for a friend (it's in the picture below, still in progress).

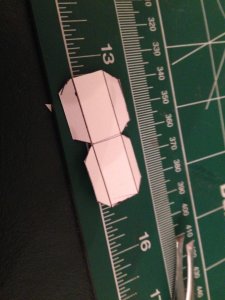
I decided to build the part anew, to make sure to pre-curve it, and to make the glue tabs twice as wide. I also put the glue on the body section, rather than the glue tab. And I held it in place for a long, long time. I don't know which of those helped the most, but the sponson piece is FINALLY in place, and I can move forward on this ship. PHEW!

2014-09-16 22.11.23.jpg 2014-09-16 22.11.33.jpg
 

Rhaven Blaack

!!!THE MAN BEHIND THE CURTAIN!!!
Staff member
Administrator
Moderator
Jun 12, 2009
12,493
9,857
228
Oregon
www.deviantart.com
You may want to try Aleene's Tacky glue or Zip Dry. Both are strong and fast drying glues.
With Zip Dry, you can use it to attach other materials to your projects as well.
 
  • Like
Reactions: CrimsonLine

Rhaven Blaack

!!!THE MAN BEHIND THE CURTAIN!!!
Staff member
Administrator
Moderator
Jun 12, 2009
12,493
9,857
228
Oregon
www.deviantart.com
Assembling these parts are quite easy and straight forward.
IMAG4651.jpg

Wrap part 229 (TIGHTLY) around a thin needle or pin.
With part 228, bend the tabs back, then roll the center section (into a semi-circle).
IMAG4652.jpg

Glue part 229 into the space at the end of 228 (as shown).
IMAG4653.jpg

I hope this will help.
 

Rhaven Blaack

!!!THE MAN BEHIND THE CURTAIN!!!
Staff member
Administrator
Moderator
Jun 12, 2009
12,493
9,857
228
Oregon
www.deviantart.com
Look closely at the instructions, you will see how part 229 is rolled tightly around itself.
gun tube.png
I know that is shows the thin part of 229 still flat, but continue to roll it completely around, so that it looks like the pictures that I posted earlier.
 
  • Like
Reactions: CrimsonLine

CrimsonLine

Member
Aug 14, 2014
83
49
23
51
Poughkeepsie, NY
Slowly but surely, or at least slowly, I am still building this model! :)

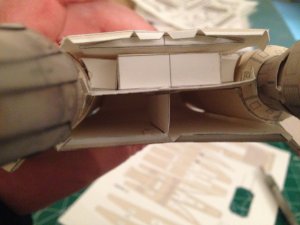
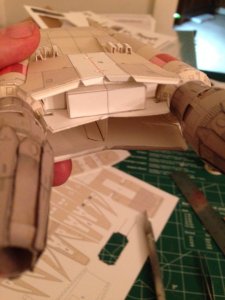
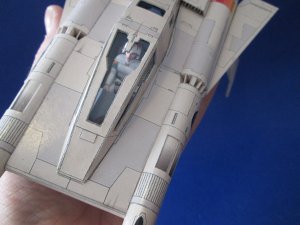
My job got really hectic around the end of September, and so not a lot of work has been done. But here's where I am right now... the dorsal and ventral skin of the fighter have been completely attached, as well as the forward weapons cones. I was finding that the aft ventral compartment kept wanting to become concave with the slightest pressure, so I built a little brace to reinforce the interior space.

2014-11-14 17.02.50.jpg 2014-11-14 17.04.53.jpg 2014-11-14 17.05.33.jpg

I am working on the forward ventral pieces now that allow for the footwell and landing gear.

Plugging away...
 

Rhaven Blaack

!!!THE MAN BEHIND THE CURTAIN!!!
Staff member
Administrator
Moderator
Jun 12, 2009
12,493
9,857
228
Oregon
www.deviantart.com
There are three formers included in the new cockpit interior template. Martin Saenger has it now is is reviewing it. Once he finishes the review, he will make it available on his website. So keep and eye on it.

You are doing good job.
KEEP CHUGGING ALONG!!!
 

mcusanelli

Well-Known Member
Feb 26, 2008
374
121
58
Crimson,
Sorry to comment late in this. When I do the nosecones, I start by gently rolling them with a round file against my leg as a work surface. As it starts to curl, I use a bit more pressure, repeating until one edge rolls over the other. Since the part is sort of an arc, you have to follow the arc as you roll. Eventually, you'll be able to 'over roll' it really tight, then the edges can match up and you can glue it. Don't cut out the cannon ports until the nose cone is glued, then use a tapered dowel for support inside it, and then cut the holes out with a fresh blade. The biggest problem I had was the tiny cannon barrels themselves, so after many failed attempts, I now use round tooth picks painted black instead. Hope this helps! Here's how they look, with painted carved dowels for the tips too.IMG_3468.JPG
 

mcusanelli

Well-Known Member
Feb 26, 2008
374
121
58
Thank you both! I didn't have a close-up of the nosecones so I used this pic instead. Part 229 and I just can't get along, so I use the painted tooth pic sections for the cannons - Hopefully this tip will help someone out! And, if you glue them to the inside blast tube before you insert it into the nosecone, it makes it a bit easier to handle and locate. Coloring the barrel with a sharpie, and rubbing over it with pencil graphite gives it a nice gunmetal look too.
 

mcusanelli

Well-Known Member
Feb 26, 2008
374
121
58
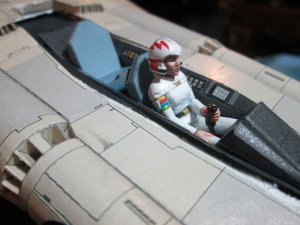
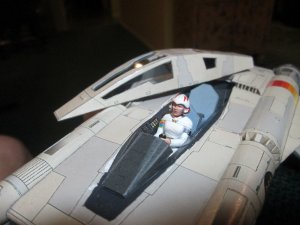
Thanks Crimson! No, she's a resin casting of a figure i sculpted originally for the old Monogram Starfighter. Had a few casts laying around, so in she went! If you don't mind, here are a couple of pics.......By the way, the cockpit add on that RF and RB created is amazing! Thanks for that, guys! I had to hack it up a bit because my figure was a bit too big for it, but it worked great in the end. I really love the Thunderfighter, and this kit and it's add-ons is very special:)
IMG_2861.JPG IMG_2859.JPG IMG_3463.JPG
 
  • Like
Reactions: CrimsonLine

Rhaven Blaack

!!!THE MAN BEHIND THE CURTAIN!!!
Staff member
Administrator
Moderator
Jun 12, 2009
12,493
9,857
228
Oregon
www.deviantart.com
Thanks Crimson! No, she's a resin casting of a figure i sculpted originally for the old Monogram Starfighter. Had a few casts laying around, so in she went! If you don't mind, here are a couple of pics.......By the way, the cockpit add on that RF and RB created is amazing! Thanks for that, guys! I had to hack it up a bit because my figure was a bit too big for it, but it worked great in the end. I really love the Thunderfighter, and this kit and it's add-ons is very special:)
View attachment 137860 View attachment 137861 View attachment 137862

You did a GREAT JOB with the figurine. She looks FANTASTIC!!!
However, it you are interested in a (EDD Pilot) paper figurine, you can find it here: http://tcfgaming.com/.
Just to let you know, there is a detail (screen accurate) version of the cockpit interior now available on Martin's site.
 

mcusanelli

Well-Known Member
Feb 26, 2008
374
121
58
Thanks RB ! I'm going to download it and use it in the next one! So far I've built 4 of them, but it's such a favorite I know there's another build in the near future for me......Maybe with landing gear down this time.