Star Trek: Enterprise:- Di-Whale's D'Kyr - micro(ish) build log

linweseregon

Senior Member
Nov 23, 2013
269
505
123
Scotland
First of all - many thanks to D-Whale for this awesome model :).
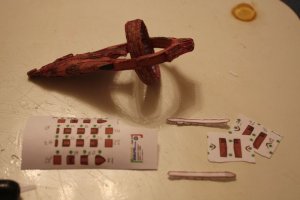
So... I've taken the patterns and shrunk them so that the smallest pieces are just workable and no more - ~ 1/2mm thick. At this size I've fit four pages across an A4 sheet, which allows me to print all 12 (out of 13) pages plus another two less complicated models on one A4 sheet - to keep in synch with my other micros I didn't print the stand, brilliant as it is!
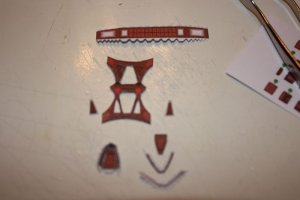
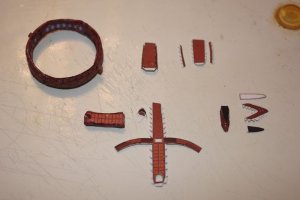
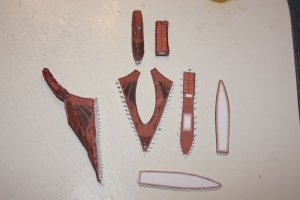
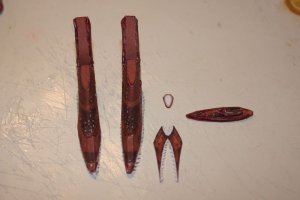
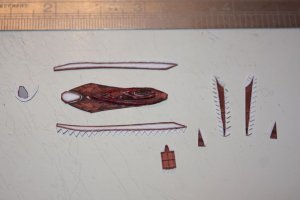
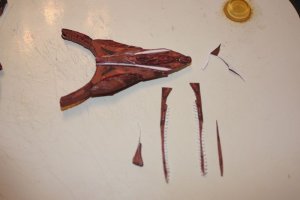
After three days this is what I've built so far:-
002.JPG
004.JPG
005.JPG
This is when I realised that 200gsm card would be too thick for some parts as the tabs were bulking the parts far too much. I reprinted the entire set on a page of copy paper and I'm using card for larger structural parts and braces. Although I can usually put together a model every day, this one will probably take around a week - mainly due to time spent cutting tabs and sometimes finding that the tabs then have to be removed because they're causing too much bulk. This is not a complaint! It's worth every single second!!! At this size tabs are often unnecessary anyway.
You may ask "Why are you using such thick card?!?" It's what I'm used to working with when using Drex Files and I find that thinner card or paper is not durable enough to withstand too much pressure from tweezers when it has glue applied.
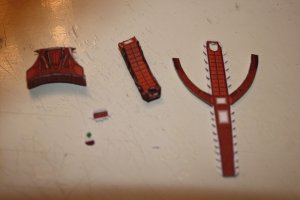
Anyway, on with the show:-
008.JPG
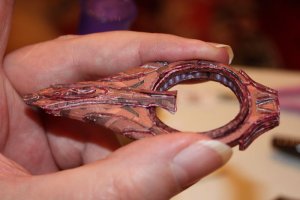
I realise that the ring looks like a dog's dinner just now, but that is why there are stabilisers underneath it. It will look grand once it's attached and the white edges are touched up ;-).
Another reason for this model taking (much) longer for me is the absolutely stunning level of detail in the plans. The first piece built (measuring 16mm across in my version) has 12 parts!
 

D-WHALE

Utopia Planitia Engineer
Aug 25, 2007
485
405
58
48
Schwedt/Oder, Germany
first: good start but aou should try edge coloring! the model looks than much better!

second: the model was designed for paper with approx 160 g/m²! if you shrink a model you must also reduce the paperweight! maybe 80g/m² is better, but not 200g! thats like tank steel!
 

linweseregon

Senior Member
Nov 23, 2013
269
505
123
Scotland
Thanks for the tips D-Whale :). I'm trying to colour the edges, but I should have done them before I fitted them; now I'm trying to touch up 1/8mm lines with a 1/2mm nib! D'uh! The card is waaay too thick for many of the parts, but I'll persevere with a combination of card and paper; if it doesn't work out I can always start again.
Now, where did I put that microscope? ;-)
 

Rhaven Blaack

!!!THE MAN BEHIND THE CURTAIN!!!
Staff member
Administrator
Moderator
Jun 12, 2009
12,485
9,832
228
Oregon
www.deviantart.com
It is always best to paint the edges before assembly.

The best thing that I have found for edge colouring is water colour paint and a VERY FINE & THIN brush.
Just remember, "A little dab will do you".

As D-WHALE said, you are off to a REALLY GOOD start.

As for using paper that is too thick, do not worry about it. It is a common mistake that everyone makes. I have made that same mistake MANY times!!!
Then again, that is the best thing about this hobby. If you make that kind of mistake (or something similar), you can always start over (which I know that I have done MANY TIMES!!!).

GOOD LUCK with this project. I will be following it!!!
 

linweseregon

Senior Member
Nov 23, 2013
269
505
123
Scotland
It wasn't so much a mistake as using what I have to hand - lol. I've got a huge pile of 200gsm and a few pages of copy paper and nothing else! The white edges aren't as starkly in contrast in normal light, but I've still started to pick up the brown pens before the glue stick ;-).
 

linweseregon

Senior Member
Nov 23, 2013
269
505
123
Scotland
Progress has been slow today - too much running around for my elderly parents. The ring turned out really well once I'd removed the tabs. The mix of paper and card is also working well and I'm very satisfied with the results so far :).
002.JPG
After four (or is it five?) days I'm only half-way down the second (of seven) page of instructions, so I might have to take a wee break and knock off something dead easy - lol. After all, I still have loads of posts to make before I can enter the download section ;-).
 

D-WHALE

Utopia Planitia Engineer
Aug 25, 2007
485
405
58
48
Schwedt/Oder, Germany
yep, it´s not my easiest model, but if you finish it, it is worth the effort! I still wonder that some guys can put 3 or 4000 parts on my models! :eek:
as i can see you do now coloring and it looks much better now! Hint: give the flaps on the bending edge also a bit paint! ;)
 

micahrogers

Moderator "Where am I, and how did I get here?"
Staff member
Moderator
Jul 12, 2012
3,773
4,643
113
Shannon GA
looks really great so far, D-Whale, where can your models be found?
 

linweseregon

Senior Member
Nov 23, 2013
269
505
123
Scotland
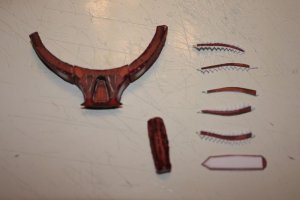
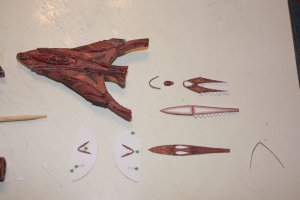
More progress on the ring support today:-
002.JPG
The photos are showing the parts much larger than they actually are and white areas which are very obvious in the photos aren't really noticeable to the naked eye.
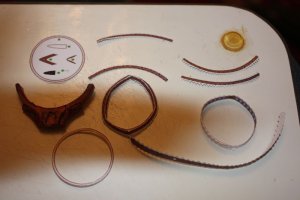
I've also made a start to what I'm assuming is the bridge:-
003.JPG
To give an idea of the size of pieces I'm working with, the white oval is ~2.5mm across. The model is now nearing the halfway mark in it's construction :)
 

linweseregon

Senior Member
Nov 23, 2013
269
505
123
Scotland
It's starting to come together very nicely :)
004.JPG
006.JPG
I'm loving the challenge of working with strips which are under 1mm thick, especially when it is turning into such a superb model. D-Whale's design is a masterclass in how it should be done - a place for everything and everything in it's place! :)
 

linweseregon

Senior Member
Nov 23, 2013
269
505
123
Scotland
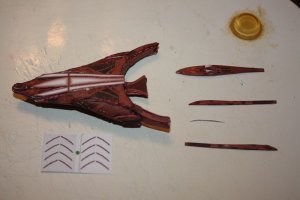
With the upper hull finished it's time to move onto the underside:-
001.JPG
The camera flash is showing white joins which I just can't see in ordinary light! Anyway, here are the finishing parts for the ventral hull:-
004.JPG
With the hull finished the ring could be fitted:-
007.JPG
And I'm into the 'home straight'! You'll be looking at this and grimacing at all the white edges, but they really don't show in normal light! When I'm finished building I'll go over the edges with a bit of paint - if I can find any...
 

Rhaven Blaack

!!!THE MAN BEHIND THE CURTAIN!!!
Staff member
Administrator
Moderator
Jun 12, 2009
12,485
9,832
228
Oregon
www.deviantart.com
This project is coming along quite nicely.
You are doing a really good job!

As for the white lines, just look at it as a learning experience.
 

linweseregon

Senior Member
Nov 23, 2013
269
505
123
Scotland
The last pieces, ready to be cut and attached:-
001.JPG
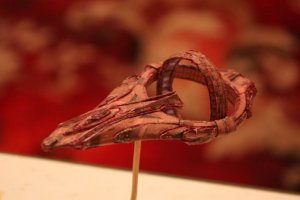
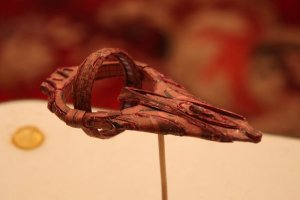
And after mounting we have a Vulcan D'Kyr 3 1/4" (83mm) from bow to stern.
004.JPG
005.JPG
Thank-you once again D-Whale :)
 
  • Like
Reactions: D-WHALE

Rhaven Blaack

!!!THE MAN BEHIND THE CURTAIN!!!
Staff member
Administrator
Moderator
Jun 12, 2009
12,485
9,832
228
Oregon
www.deviantart.com
You did a REALLY GOOD JOB on this!!!
Even with you using the much thicker paper, it still came together nicely.
I am looking forward to seeing what your next project is.

KEEP UP THE GOOD WORK!!!
 
  • Like
Reactions: linweseregon

linweseregon

Senior Member
Nov 23, 2013
269
505
123
Scotland
@D-WHALE
lmao - yeah, I'll add Paragon's DSRV just as soon as I can afford an electron microscope ;-)
It is looking good and I'm glad to see that your others are available again. Keep up the great work - without guys like you, gals like me wouldn't be able to show off :)