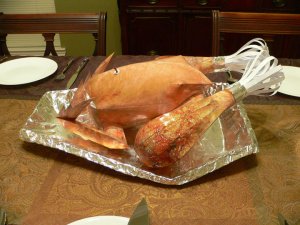
Thanksgiving Turkey (Big Roast Chicken)

DAVESTAR

Well-Known Member
Oct 25, 2013
144
185
58
Greetings from Texas. This is my first build thread and I hope it is useful to someone. Being a newbie is tough on here - not much I can offer as far as expertise considering all the great talent on this site. But you can't use that as an excuse not to contribute - so here goes...

This build is as I do it in sections so corrections will be at the bottom - so best to read all the posts to make sure there were no changes or after thought suggestions.

Project: Turkey! (ok Roast Chicken)
Why: November? (Just saw Free Birds with my son...) Looks easy - I like easy.
Changes: Supersized (wanted a Turkey - not a small chicken)

Materials
Elmer's CraftBond Paper Craft Glue Gel
Kodak Photo Paper (kinda glossy - the cheap thin one - good for buttons)
Scissors and an X-acto if needed.

Super sizing -
The model was in a PDF. Using Reader version 11, in the print menu, select "Poster" and set the percentage to 212:
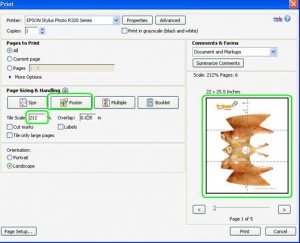
TurkeyPrintSettings.jpg
The original model takes 5 pages, this change grows it to 6 pages per original page for a total of 30 pages. That's an expensive turkey to me paper wise - hope it can hold its own weight - we'll see:
ProjectStack.jpg
To give an idea of the size, here is a side by side comparison (printed the pan at normal size in draft mode so it could be seen - that's it on the normal 8.5 x 11 letter sized paper on the right):
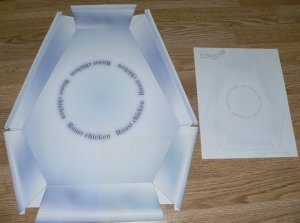
PanSideBySideSize1.jpg
The poster (tiling) setting will chop up the model so not all the parts will be contiguous - they will have to be assembled to become one large part - there will be no tabs but there will be a small margin that can be used as a tab - or you could use a strip of paper behind both pages for the best look. (Learned that here by the way :thumb:)
Sample of a part crossing over two pages:
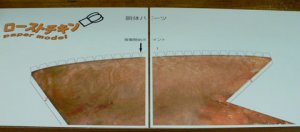
TiledPieces1.jpg
We'll start with the pan as it should be simple to do.
Here is the top of the pan cut out:
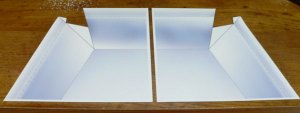
CutTiledPieces1.jpg
Here is the top of the pan "merged" into one piece. I just trimmed the margin off of one side and glued it on top of the margin on the other side:
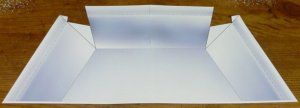
MergedTiledPieces1.jpg
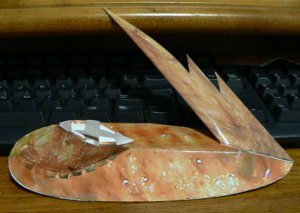
Here is the completed pan print side up and the original size pan for comparison:
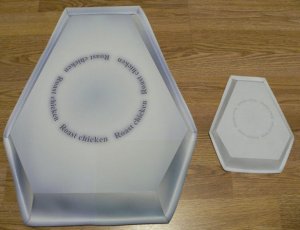
CompletedPanPrintSide.jpg
Here is the completed pan back side up and the original pan for comparison:
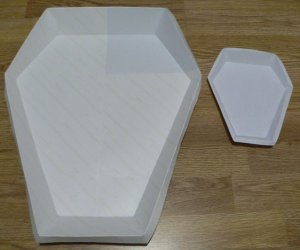
CompletedPanBackSide1.jpg
According to the fold lines (if I read them right) this pan could either be print side up and used as a display stand or print side down and used as an actual pan - which would leave the blank paper back showing. Guess we'll see what looks best when the turkey is finished - I suppose foil paper could be used to hide the exposed paper backing.

Putting the pieces together is a challenge since the translation from Japanese is hilarious:
instr.jpg

Nothing like a good puzzle...

Well that's it for now, more to follow- the plan is to finish well before the 24th of this month! Thanks.
 

Rhaven Blaack

!!!THE MAN BEHIND THE CURTAIN!!!
Staff member
Administrator
Moderator
Jun 12, 2009
12,490
9,852
228
Oregon
www.deviantart.com
Well it looks like you are off to a very good start.
I am curious to see how this will turn out.

Do not worry about being a newbie. We all had to start some where. I remember my first kit was the BRTC25 Thunder Fighter by Martin Sanger. My first attempt was (in my opinion) ABSOLUTE RUBISH (but it was still my first kit.). I too felt rather intimidated when I was looking through all of the threads and wondering "How am I going to be able to compete with these guys"? I very quickly learned that I did not have to compete with anyone. Everyone here had welcomed me and encouraged me to continue building and to improve my skills. There were many members who even shared tips & techniques and their knowledge and insight on how to do various things. I sat there reading everything that was sent to me and took it all onboard.
Not only that, but if I say someone doing something that I thought was interesting, I would (and still do) contact them and ask questions about what it was that I was interested in, and received GREAT responses to those questions.

This is a place where like minded people come to share information, thoughts, ideas, and tip & techniques to promote this hobby and to help those who are new (like you) to the hobby as a whole.

So you should never be afraid of posting your work. Posting a build thread (like you are doing now) is a GREAT way to show off your work. Not only that, but you can also highlight areas that are problematic or you need help with.

With that being said, KEEP UP THE GOOD WORK!!!
 

Rogerio Silva

Active Member
Nov 9, 2012
1,520
11
38
56
Rio de Janeiro - BRAZIL !!!
Keep pushing your luck, it'll be worth it!

Well it looks like you are off to a very good start.
I am curious to see how this will turn out.

Do not worry about being a newbie. We all had to start some where. (...) I very quickly learned that I did not have to compete with anyone. Everyone here had welcomed me and encouraged me to continue building and to improve my skills. There were many members who even shared tips & techniques and their knowledge and insight on how to do various things. I sat there reading everything that was sent to me and took it all onboard.
Not only that, but if I say someone doing something that I thought was interesting, I would (and still do) contact them and ask questions about what it was that I was interested in, and received GREAT responses to those questions.

This is a place where like minded people come to share information, thoughts, ideas, and tip & techniques to promote this hobby and to help those who are new (like you) to the hobby as a whole.

So you should never be afraid of posting your work. Posting a build thread (like you are doing now) is a GREAT way to show off your work. Not only that, but you can also highlight areas that are problematic or you need help with.

With that being said, KEEP UP THE GOOD WORK!!!

I couldn't have put it in a better way. Actually, my story here was exactly that, and it still is! Don't believe me? idea1 idea1 Just check two of my threads: UHU02's Enterprise (specially the "mayday" post) and the Sting's ("I've been playing...").
If you start checking on build threads, you'll see many people here share knowledge, ask and get help, which is the only thing that makes us all able to complete a more complex model, aside a lot of patience and persistance.
So go for it, and please save me a leg of that roast chicken! :mrgreen: :mrgreen: :thumb: :thumb: :cool:
All the best,

Rogério
 

DAVESTAR

Well-Known Member
Oct 25, 2013
144
185
58
Thanks Rhaven and Rogerio for the encouragement! I just found another instruction page that shows the pan - looks like I do have it inside out - will press on - foil paper (like duct tape) fixes anything...
 

DAVESTAR

Well-Known Member
Oct 25, 2013
144
185
58
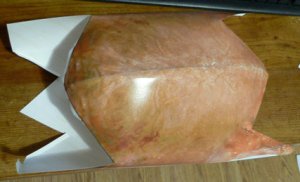
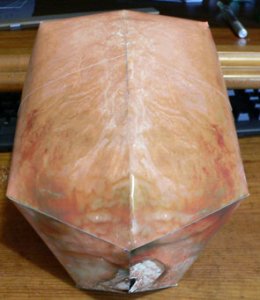
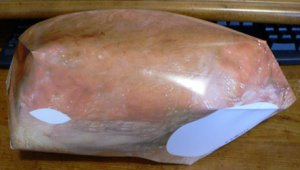
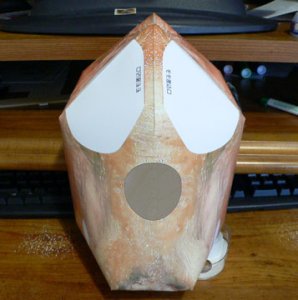
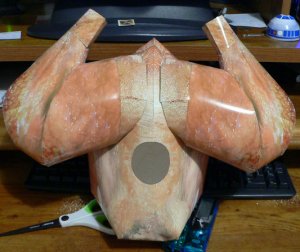
Here are some pics of the main body - it is still smaller than I wanted - but 30 pages in and November 14th already - pressing on...
body1.jpg

Finished from the top
body2.jpg

Finished from the side
body3.jpg

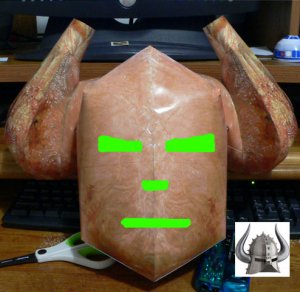
This is the bottom - looks like an Ultra-Man character mask...
face.jpg
The hole is for your fingers to help press the flaps - at least that's what the instructions sort of say (translation is funny).

Working on the wings and drumsticks (or peach per the translation) next...
 

Rogerio Silva

Active Member
Nov 9, 2012
1,520
11
38
56
Rio de Janeiro - BRAZIL !!!
Well, well, someone who knows ULTRAMAN?!?!?! Did you know they have good ULTRAMAN and ULTRA-SEVEN models out there? Check my threads and you'll find...
You're doing a good work, man. I like the textures. Keep it up!
 

DAVESTAR

Well-Known Member
Oct 25, 2013
144
185
58
Thanks Rogerio I will take a look. I remember Ultra-Man as a kid - but it was in Spanish and had to have my mother translate!

You mentioned the textures - this is not anything I created - just putting together an existing model from the net. Someday I'd like to create by own models.

Here is a wing
wing.jpg

Here is the body with legs from the bottom
CompletedBodyAndLegs.jpg

Here is the body and legs from the top - a little bigger and some slits and it would make a helmet!
TurkeyHelmet.jpg

Just have to attach the wings and make the frills (leg coverings)...
 

Rogerio Silva

Active Member
Nov 9, 2012
1,520
11
38
56
Rio de Janeiro - BRAZIL !!!
Ultraman... IN SPANISH??? Oh, boy, that's gotta be something! Well, I remember Ultraman (and Ultra-Seven) as a kid, too, but fortunately they played a (Brazilian) Portuguese-dubbed version. Anyway, it was shown in TV along with the 1966 Batman series, and it made me wonder how their lips moved differently from the words they were saying (I didn't know, at that time, that it was dubbed... :cry:)
I can't count howe many times I've tried to transform myself into one of those three, and the many, many masks I've made to get it. Oh, boy, that brings memories... :cool:
Never mind that. The main thing here is the quality of your work, which is cool enough. I liked the helmet association!
 

DAVESTAR

Well-Known Member
Oct 25, 2013
144
185
58
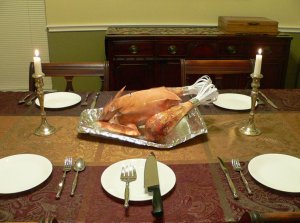
Alright - finished it last night 11/16/2013!

Here are the "money shot" pictures and lessons learned are below them:

MoneyShot-1.jpg

MoneyShot-2.jpg

Uses:
Will take it to work as a Thanksgiving decoration in my cubicle. Thought about making a paper chef's hat and a paper carving knife and walking it in with oven mitts - but that's not going to happen.
If it survives or I don't give it away, I may use it in next years pumpkin carving contest - stand it up and cut the standard jack-o-lantern face on the breast - easy to put a flashing light in it since it has a big hole on the bottom. Worth a try since my paper pumpkin didn't win...:cry:

Extras:
1. Added a popup Turkey timer (2 for 97 cents) - had to bake it for a while to get it to pop then glued it into the model.
2. Added a band of foil paper to each frill (leg tip coverings)
3. Added a rock inside of model as it was leg heavy and the body would not stay down.
4. Covered the inside and edges of the tray with foil paper. (Assembled it inside out - did not see the version of the instructions with it pictured until afterwards...:crash:

Lesson Learned
1. Start a holiday project well ahead of the holiday so it is displayable for the whole holiday month/season.
2. If you think its big enough - make it a little bigger (if you can afford the paper)
3. This model had thick printed fold lines which could have been cut off on some of the edges so they were not so visible.
4. Make sure you know what all the parts are for. Test fit them all if possible - I was left with two parts and thought I was finished - figured it out a little late and had to improvise. To my defense - the translated instructions did not show a picture of how the parts were used and the printing next to the parts was in Japanese. :confused:

If I had the time, it would be neat to get a electronic sound/shake box that says "gobble gobble" and shakes the whole turkey - probably off of some stuffed turkey toy (or stuff the whole toy inside.)

Fun to do - Happy Thanksgiving - remember to give thanks! :thumb:

Thanks to Atelier Fare (I think) for designing this model.

Thank you for following along.
 

Revell-Fan

Co-Administrator
Staff member
Administrator
Moderator
Aug 1, 2009
11,594
12,334
228
Vreden
Exellent work! Your hat idea reminded me of that X-mas episode from Mr Bean... :mrgreen:

[YOUTUBE]A0m_o2gxbsU[/YOUTUBE]
 

DAVESTAR

Well-Known Member
Oct 25, 2013
144
185
58
Thank you ltzealot. Sometimes you just have to have fun with flat pieces of paper turning into a 3D object - I love it.
 

DAVESTAR

Well-Known Member
Oct 25, 2013
144
185
58
LOL - That turkey was huge! Thanks for that Revell-Fan! I needed the laugh.
If I had seen that first I would have doubled the size of the build - after all its only paper!