Model Of The Month: Daishi's Frost Dragon by DanBKing
- Thread starter DanBKing
- Start date
You are using an out of date browser. It may not display this or other websites correctly.
You should upgrade or use an alternative browser.
You should upgrade or use an alternative browser.
Dragons!
Dan
Man, you're destroying the common belief/knowledge that dragons do not exist! Absolutely wonderful!:thumb: :thumb:
Although incomplete, it does look alive!:-o
Dan
Man, you're destroying the common belief/knowledge that dragons do not exist! Absolutely wonderful!:thumb:
Although incomplete, it does look alive!:-o
A visit to the Gym.....
Thanks for the compliments guys!
It is time to pump it up and do some body building!:mrgreen:
The body consists of 82 pieces. The head/neck, both wings, and the hips/legs/tail, fit to the body assembly. All the connections of the internal armature come together inside the body cavity. The assembly itself has three internal support pieces.
My plan of attack, is to first build the upper ring that connects to the neck, then the shoulders up to the attachment point to the wings and then the rest of the plated spine/back section. I am going to leave the front breast plate pieces un-assembled leaving the body cavity open at the front. This will allow me to connect the wing armatures to the main armature, and fill the cavities of the neck, shoulders, upper arms, and the top of the body cavity with expanding foam for rigidity and strength. Once all that is dried, I will then attach the breast plate pieces to close up the front.
At this point, I should hopefully be able to hold up the whole upper body/head/neck/wings assembly from the main armature wire, a bit like a lollipop on a stick!!:mrgreen: Hopefully, things will become clearer as I go along....
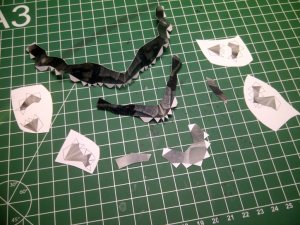
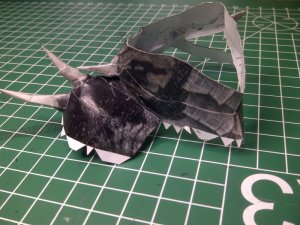
I prepared the pieces at the top of the body that attaches to the neck.
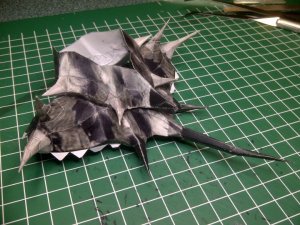
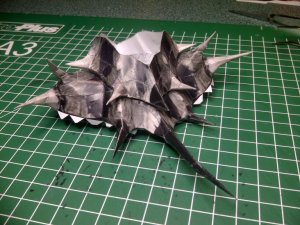
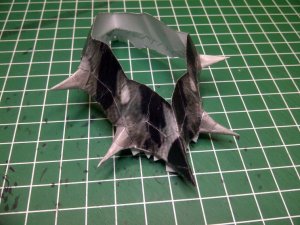
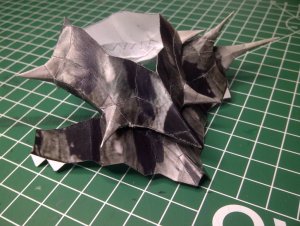
And assembled them checking for shape against the neck.
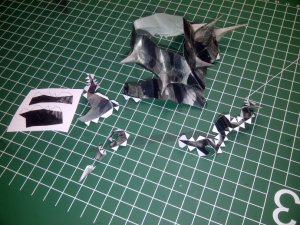
And on to the shoulders and the first of the main horned back plates.
I will try and get some more done today, but the weather is super outside with good sunshine, and that is something we don't see a lot of here, so, I'm gonna make the best of it and soak up some vitamin D !!!!
See you soon with an update...

P.S: MULTIPLE PHOTO UPLOAD IS FANTASTIC!!!!!!!! WELL DONE GUYS!!!!!! AN IMPROVEMENT TO THIS SITE THAT HAS BEEN LONG AWAITED .....bounce7
balloon6
Thanks for the compliments guys!
It is time to pump it up and do some body building!:mrgreen:
The body consists of 82 pieces. The head/neck, both wings, and the hips/legs/tail, fit to the body assembly. All the connections of the internal armature come together inside the body cavity. The assembly itself has three internal support pieces.
My plan of attack, is to first build the upper ring that connects to the neck, then the shoulders up to the attachment point to the wings and then the rest of the plated spine/back section. I am going to leave the front breast plate pieces un-assembled leaving the body cavity open at the front. This will allow me to connect the wing armatures to the main armature, and fill the cavities of the neck, shoulders, upper arms, and the top of the body cavity with expanding foam for rigidity and strength. Once all that is dried, I will then attach the breast plate pieces to close up the front.
At this point, I should hopefully be able to hold up the whole upper body/head/neck/wings assembly from the main armature wire, a bit like a lollipop on a stick!!:mrgreen: Hopefully, things will become clearer as I go along....
I prepared the pieces at the top of the body that attaches to the neck.

And assembled them checking for shape against the neck.

And on to the shoulders and the first of the main horned back plates.


I will try and get some more done today, but the weather is super outside with good sunshine, and that is something we don't see a lot of here, so, I'm gonna make the best of it and soak up some vitamin D !!!!
See you soon with an update...

P.S: MULTIPLE PHOTO UPLOAD IS FANTASTIC!!!!!!!! WELL DONE GUYS!!!!!! AN IMPROVEMENT TO THIS SITE THAT HAS BEEN LONG AWAITED .....bounce7
balloon6
Thanks for the compliments guys!
It is time to pump it up and do some body building!:mrgreen:
The body consists of 82 pieces. The head/neck, both wings, and the hips/legs/tail, fit to the body assembly. All the connections of the internal armature come together inside the body cavity. The assembly itself has three internal support pieces.
My plan of attack, is to first build the upper ring that connects to the neck, then the shoulders up to the attachment point to the wings and then the rest of the plated spine/back section. I am going to leave the front breast plate pieces un-assembled leaving the body cavity open at the front. This will allow me to connect the wing armatures to the main armature, and fill the cavities of the neck, shoulders, upper arms, and the top of the body cavity with expanding foam for rigidity and strength. Once all that is dried, I will then attach the breast plate pieces to close up the front.
At this point, I should hopefully be able to hold up the whole upper body/head/neck/wings assembly from the main armature wire, a bit like a lollipop on a stick!!:mrgreen: Hopefully, things will become clearer as I go along....
I prepared the pieces at the top of the body that attaches to the neck.
View attachment 116418
And assembled them checking for shape against the neck.
View attachment 116419
And on to the shoulders and the first of the main horned back plates.
View attachment 116420
View attachment 116422
View attachment 116421
I will try and get some more done today, but the weather is super outside with good sunshine, and that is something we don't see a lot of here, so, I'm gonna make the best of it and soak up some vitamin D !!!!
See you soon with an update...
P.S: MULTIPLE PHOTO UPLOAD IS FANTASTIC!!!!!!!! WELL DONE GUYS!!!!!! AN IMPROVEMENT TO THIS SITE THAT HAS BEEN LONG AWAITED .....bounce7
balloon6
You are doing a PHENOMINAL JOB on this model!!!
As for the multiple photo uploads, I am glad that you like the improvement. As time goes on, there will be a few more minor improvements made. Please be patient.
Broad shoulders.
Nearly 2 weeks ? Wow, I didn't realize it has been that long since I posted anything.
Sorry about that, but general life has kept me away from modelling, but I have managed to get some done.
I finished off the back of the body and its myriad of spikes.
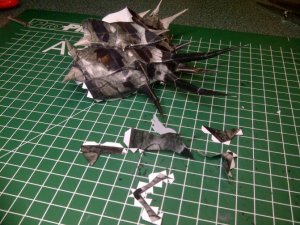
I luckily noticed a posting from Daishi in his build thread, where he mentions that two spikes were missing from the back.
One at the top and the last spike before the waist. In the pic what should be a spike, but is only a stub, is circled.
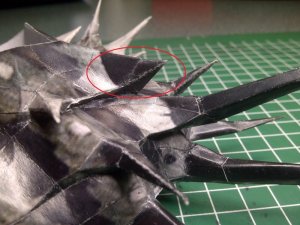
It was just a case of trimming off the point of the 'stub' and attaching the spikes which are printed on the pages for the leg/tail assembly. (I was wondering why the Pep file for the legs had two strange spikes hanging in mid-air, but now I know. )
)
So, with the missing spikes now added, the waist was attached to complete the back.
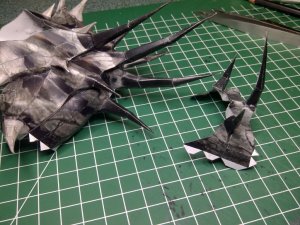
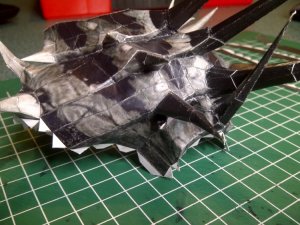
Next, the pieces were prepared to start attaching the wings.
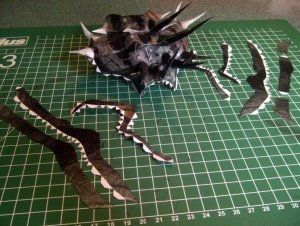
Before the wings, I attached the head to the body.
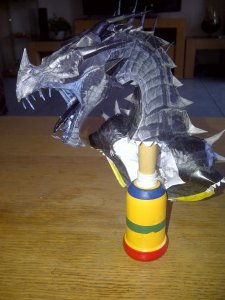
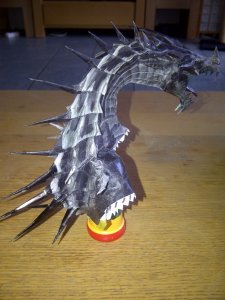
I hope to get both wings attached tomorrow. This will be a fiddly process, as I have to connect the wing armatures to the main armature inside the body. But, I don't foresee any major problems.
Last weekend I was out cycling with my girlfriend when she called me back and pointed out some small stones that had a similar colouring to the main rock that the dragon stands on. We stopped and collected a few. When I got home I put them in the ultrasonic cleaner for 1/2 an hour, to get rid of all the grit and dust. I intend to use these as decoration around the bottom of the rock. The pic shows them just placed in position to see what they look like. The colour match is perfect! I will be doing a lot more texturing to the base later in the build. Thumbs up to the girlfriend and well spotted!:thumb:
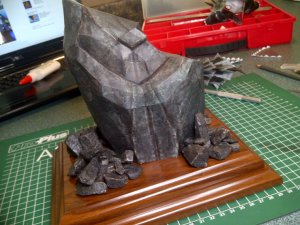
I will hopefully be back tomorrow with more!

Nearly 2 weeks ? Wow, I didn't realize it has been that long since I posted anything.
Sorry about that, but general life has kept me away from modelling, but I have managed to get some done.
I finished off the back of the body and its myriad of spikes.

I luckily noticed a posting from Daishi in his build thread, where he mentions that two spikes were missing from the back.
One at the top and the last spike before the waist. In the pic what should be a spike, but is only a stub, is circled.

It was just a case of trimming off the point of the 'stub' and attaching the spikes which are printed on the pages for the leg/tail assembly. (I was wondering why the Pep file for the legs had two strange spikes hanging in mid-air, but now I know.
So, with the missing spikes now added, the waist was attached to complete the back.


Next, the pieces were prepared to start attaching the wings.

Before the wings, I attached the head to the body.


I hope to get both wings attached tomorrow. This will be a fiddly process, as I have to connect the wing armatures to the main armature inside the body. But, I don't foresee any major problems.
Last weekend I was out cycling with my girlfriend when she called me back and pointed out some small stones that had a similar colouring to the main rock that the dragon stands on. We stopped and collected a few. When I got home I put them in the ultrasonic cleaner for 1/2 an hour, to get rid of all the grit and dust. I intend to use these as decoration around the bottom of the rock. The pic shows them just placed in position to see what they look like. The colour match is perfect! I will be doing a lot more texturing to the base later in the build. Thumbs up to the girlfriend and well spotted!:thumb:

I will hopefully be back tomorrow with more!

Getting in a flap....
Thanks Rogerio! :mrgreen:
I have at last got the wings attached to the body.
This was a job that I did not have enough hands for......
Getting the first wing on was not much of a problem....
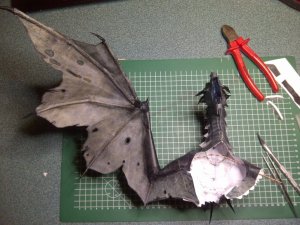
This is where things became a fiddly nightmare. I ended up using some cushions to support every thing while I attached the second wing.
You can also now appreciate the size of this beast, in comparison to my 17" laptop.......!!!
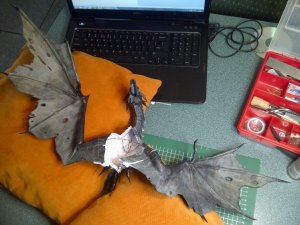
The two wing armatures were bent where they meet in the middle and cut to length. These will then attach to the main armature that connects to the legs.
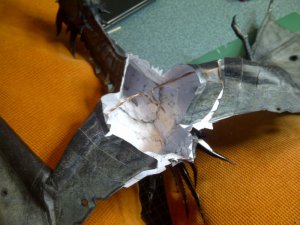
Now that the wings are attached, the next stage is adjusting the armature connections, filling with foam where needed and attaching the breast plates. Once the breast plates and associated internal support pieces are attached everything will pull into the correct shape.
I hope to post the pics of this process in the next couple of days. Then, once all this is done, apart from some touch-ups, the top half of the model is complete. :mrgreen:
Here are two pics of the attached wings.
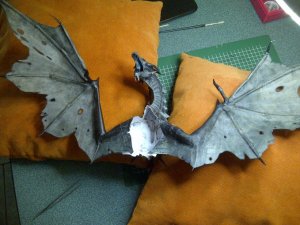
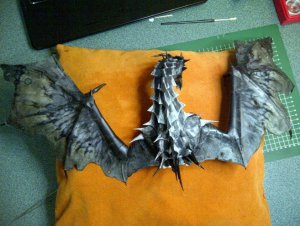
See you all soon.

Thanks Rogerio! :mrgreen:
I have at last got the wings attached to the body.
This was a job that I did not have enough hands for......
Getting the first wing on was not much of a problem....

This is where things became a fiddly nightmare. I ended up using some cushions to support every thing while I attached the second wing.
You can also now appreciate the size of this beast, in comparison to my 17" laptop.......!!!

The two wing armatures were bent where they meet in the middle and cut to length. These will then attach to the main armature that connects to the legs.

Now that the wings are attached, the next stage is adjusting the armature connections, filling with foam where needed and attaching the breast plates. Once the breast plates and associated internal support pieces are attached everything will pull into the correct shape.
I hope to post the pics of this process in the next couple of days. Then, once all this is done, apart from some touch-ups, the top half of the model is complete. :mrgreen:
Here are two pics of the attached wings.


See you all soon.

What a beast! Erh, not you, Dan, I mean, "The Beast" (that thing with the wings)! 
Astonishing, overwhelming and intimidating..! WOW!
Astonishing, overwhelming and intimidating..! WOW!
It looks so darned REAL!!! It reminds me of "Game of Thrones". Are you sure you don't belong to the Targaryan family? HOHOHOHOHOH...
The pits...... Just too much at once.......
:cry:
Please allow me a moment........
Please allow me a moment to swear, curse and rant........
I will make one promise: I will swear at least 100 times, without repeating myself.............
.
.
.
.
.
.
.
.
.
.
.
.
Thank you for your patience.
I will call it a SETBACK. :-(
Anyway,......... Let me explain.........
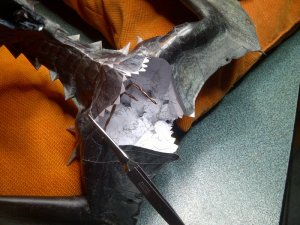
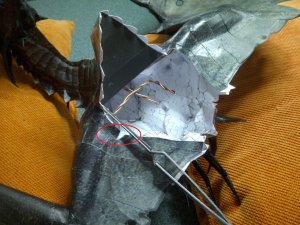
I started to build up the chest. I laminated the former onto a thin but dense card to make it firmer. A Firmer Former....
Notice the circled area....The start of my problems ......
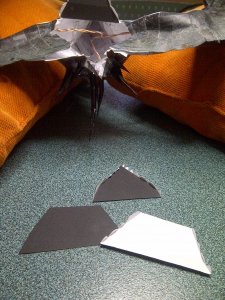
I laminated the other formers ready to be firmly formed..
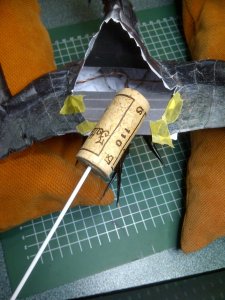
The main armature wire was topped off by being pushed into a wine cork, (drinking has its uses in this hobby :mrgreen:,) and this was then placed into the neck cavity. I temporarily attached the cross-former with tape, to hold things in shape, while the foam set.
I forgot to take photo's of the next step, but as reference they would be useless......... Basically, I attached the wing armatures to the corked-up main armature and then filled the cavities with expanding foam. (A Scottish company should market the stuff and call it "Phil McAvity" sign1sign1 )
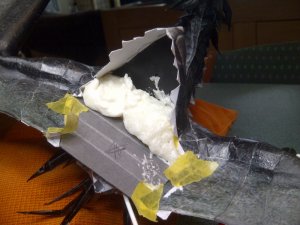
The results of the this step, I will now present to you photographically instead of textually, (mainly to stop me being banned for foul language ops
ops
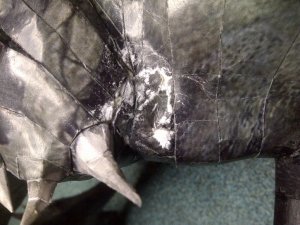
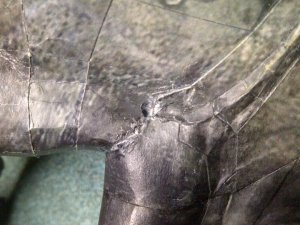
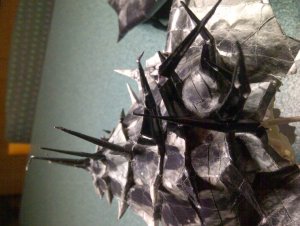
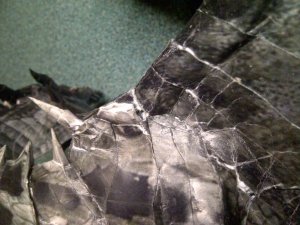
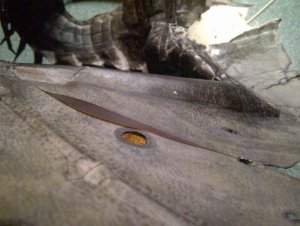
When I have fixed this disaster, I will be back. Either with the current repaired build, or a f.............. complete re-make.
:curse:
:cry:
Please allow me a moment........
Please allow me a moment to swear, curse and rant........
I will make one promise: I will swear at least 100 times, without repeating myself.............
.
.
.
.
.
.
.
.
.
.
.
.
Thank you for your patience.
I will call it a SETBACK. :-(
Anyway,......... Let me explain.........
I started to build up the chest. I laminated the former onto a thin but dense card to make it firmer. A Firmer Former....
Notice the circled area....The start of my problems ......


I laminated the other formers ready to be firmly formed..

The main armature wire was topped off by being pushed into a wine cork, (drinking has its uses in this hobby :mrgreen:,) and this was then placed into the neck cavity. I temporarily attached the cross-former with tape, to hold things in shape, while the foam set.

I forgot to take photo's of the next step, but as reference they would be useless......... Basically, I attached the wing armatures to the corked-up main armature and then filled the cavities with expanding foam. (A Scottish company should market the stuff and call it "Phil McAvity" sign1sign1 )

The results of the this step, I will now present to you photographically instead of textually, (mainly to stop me being banned for foul language


When I have fixed this disaster, I will be back. Either with the current repaired build, or a f.............. complete re-make.
:curse:
Oh man, what a major setback !
I hope you find the courage to start over.
Starting over is my last resort...........
:v8:
OH NOOOOOO!!! THIS STUFF SHOULD BE PROHIBITED! Take a look at THIS:
http://www.therpf.com/f10/ranger-3-b-foam-cautionary-tale-134114/
:-(
Oh, Dan, I really hope you can salvage something from your build...
OH NOOOOOO!!! THIS STUFF SHOULD BE PROHIBITED! Take a look at THIS:
http://www.therpf.com/f10/ranger-3-b-foam-cautionary-tale-134114/
:-(
Oh, Dan, I really hope you can salvage something from your build...
OUCH!! That doesn't look good!
I started experimenting with expanding foam too, on my MK2 dragon build.
Found some with a low expansion ratio / slow dry time.
But have to rebuild the left wing because it dried with the wing in a warped position.
Its great stuff when it works! But if it fails its an epic fail.
I started experimenting with expanding foam too, on my MK2 dragon build.
Found some with a low expansion ratio / slow dry time.
But have to rebuild the left wing because it dried with the wing in a warped position.
Its great stuff when it works! But if it fails its an epic fail.


