Iron Man Mk. VII by Julius Perdana

Revell-Fan

Co-Administrator
Staff member
Administrator
Moderator
Aug 1, 2009
11,595
12,338
228
Vreden
Hello, folks!

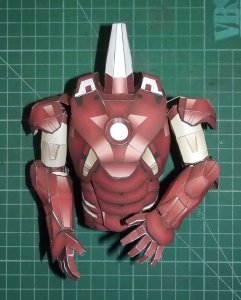
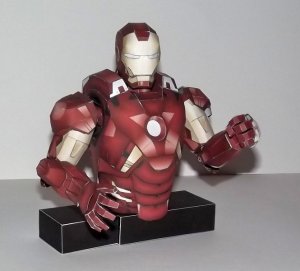
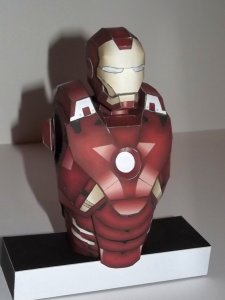
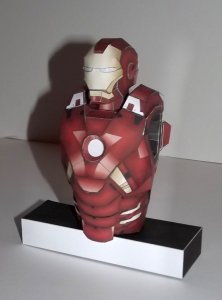
Here I give you the Iron Man Mk. VII figure by Julius Perdana from paper-replika.com. Since I am working on an articulated Crichton figure from Buck Rogers in the same scale I was wondering how Julius would make the limbs of his figure movable and thought that I could learn very much from him.

The kit itself is divided into three parts. Each of them is available in a coloured version, a white version for printing on metallic coloured paper and a *.pdo file for an additional 3D view. I waited till all parts were available so that I could print them altogether to maintain printing quality. I chose to print the coloured version because Julius spent much effort and work in making the texture.

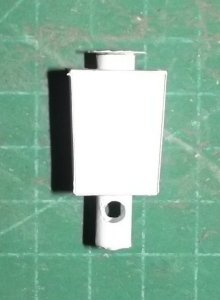
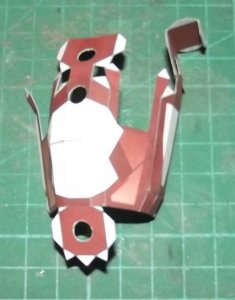
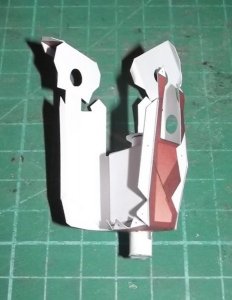
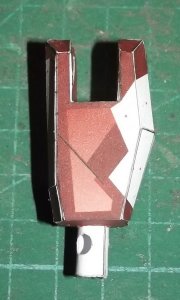
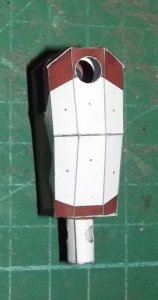
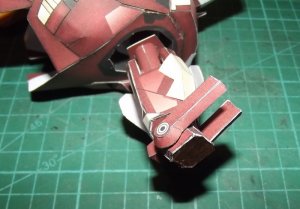
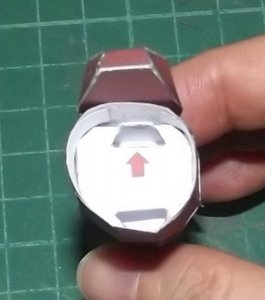
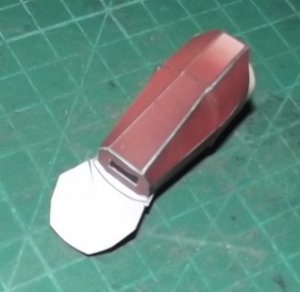
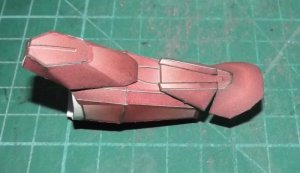
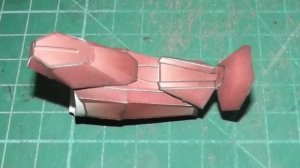
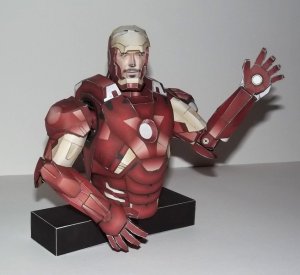
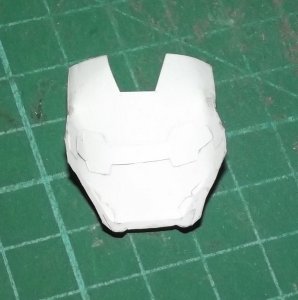
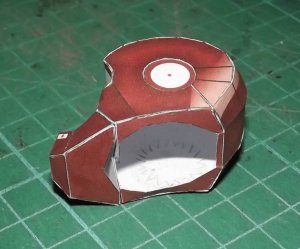
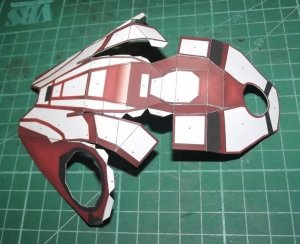
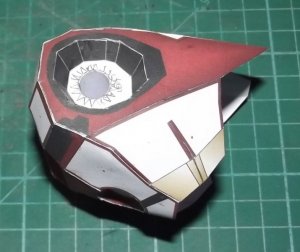
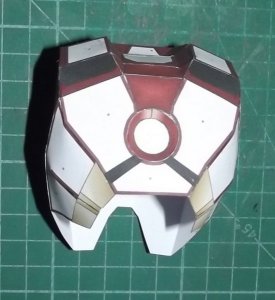
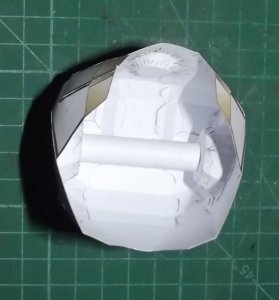
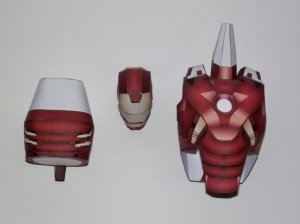
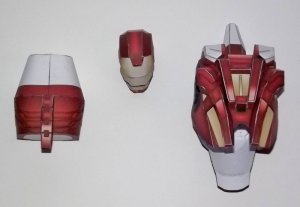
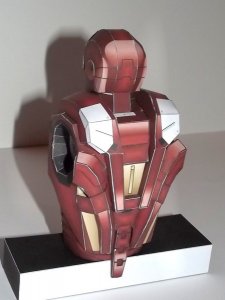
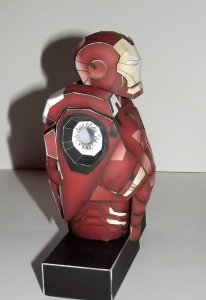
I started with the first section, head and torso.

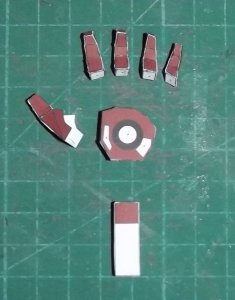
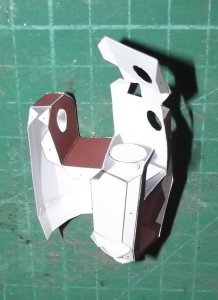
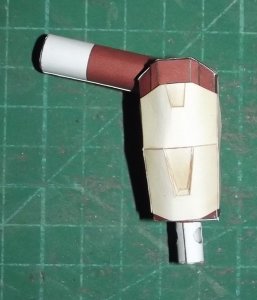
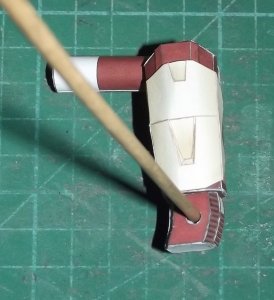
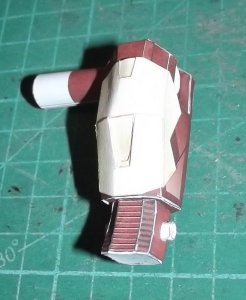
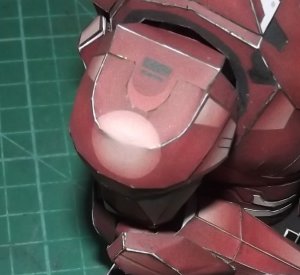
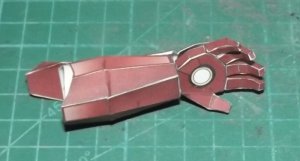
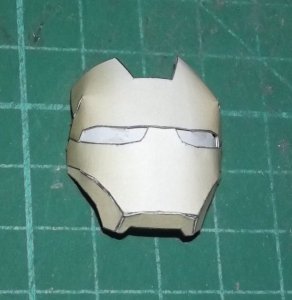
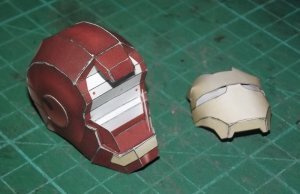
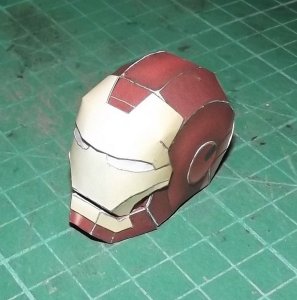
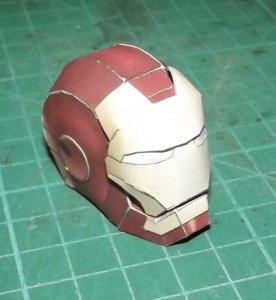
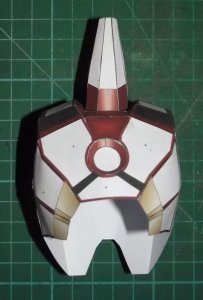
The instructions are very clear and the single parts are easy to identify. Section 1 is very easy and the result looks very convincing. This is the head. I'll have to make a new mask because the one in the pics had become victim to a drop of glue which accidentally sticked onto the visor. Due to the flash it is difficult to spot in the pics but it is there. And it looks kind of "meh".
 

Attachments

  • 1DSCF8711.JPG
    1DSCF8711.JPG
    92.6 KB · Views: 40
  • 2DSCF8712.JPG
    2DSCF8712.JPG
    94 KB · Views: 36
  • 3DSCF8709.JPG
    3DSCF8709.JPG
    119 KB · Views: 37
  • 4DSCF8713.JPG
    4DSCF8713.JPG
    107.3 KB · Views: 36
  • 5DSCF8714.JPG
    5DSCF8714.JPG
    104.2 KB · Views: 48
  • 6DSCF8715.JPG
    6DSCF8715.JPG
    89.9 KB · Views: 41

Revell-Fan

Co-Administrator
Staff member
Administrator
Moderator
Aug 1, 2009
11,595
12,338
228
Vreden
The main body. Many parts of the armour are laminated to it. Surely assembly would have been easier if everything had been printed right on the chassis, however, the laminations give the body more strength. In addition it enables you to increase the depth of some details. Before I attached the layers to the body I painted the edges with a brown felt-tip. I noticed that some parts don't have flaps. I made them myself if necessary. The overall fit is fairly good.
 

Attachments

  • DSCF8717.JPG
    DSCF8717.JPG
    131.8 KB · Views: 31
  • DSCF8720.JPG
    DSCF8720.JPG
    107.2 KB · Views: 33
  • DSCF8721.JPG
    DSCF8721.JPG
    93.9 KB · Views: 26
  • DSCF8722.JPG
    DSCF8722.JPG
    82 KB · Views: 22
  • DSCF8722a.JPG
    DSCF8722a.JPG
    79.4 KB · Views: 26
  • DSCF8723.JPG
    DSCF8723.JPG
    110.7 KB · Views: 31

Revell-Fan

Co-Administrator
Staff member
Administrator
Moderator
Aug 1, 2009
11,595
12,338
228
Vreden
And this is stage 1 completed. CU with part 2, the arms. Stay tuned! :wave:
 

Attachments

  • DSCF8725.JPG
    DSCF8725.JPG
    89 KB · Views: 39
  • DSCF8726.JPG
    DSCF8726.JPG
    92.4 KB · Views: 38
  • DSCF8727.JPG
    DSCF8727.JPG
    72.7 KB · Views: 35
  • DSCF8728.JPG
    DSCF8728.JPG
    69.8 KB · Views: 33
  • DSCF8729.JPG
    DSCF8729.JPG
    78.6 KB · Views: 40
  • DSCF8731.JPG
    DSCF8731.JPG
    72 KB · Views: 34

Revell-Fan

Co-Administrator
Staff member
Administrator
Moderator
Aug 1, 2009
11,595
12,338
228
Vreden
Thank you! BTW; I have completed the right arm. Unfortunately I was so excited that I forgot to take any photos of it, so I'll be showing you some in-progress pics of the left one.
 

Revell-Fan

Co-Administrator
Staff member
Administrator
Moderator
Aug 1, 2009
11,595
12,338
228
Vreden
Here are some close-ups of the left hand. Despite their small size the parts can be assembled easily. There are optional parts for a closed hand available, too. I will present it here, too.
 

Attachments

  • DSCF8744.jpg
    DSCF8744.jpg
    87.6 KB · Views: 27
  • DSCF8745.jpg
    DSCF8745.jpg
    75.6 KB · Views: 26
  • DSCF8746.jpg
    DSCF8746.jpg
    79.8 KB · Views: 19

Revell-Fan

Co-Administrator
Staff member
Administrator
Moderator
Aug 1, 2009
11,595
12,338
228
Vreden
And this is probably the most tricky part of section 2, the upper arm. Therefore I give you some more detailed pics which might help with your builds.

First you have to build a little box and put a tube with two holes and a stopper inside.
 

Attachments

  • DSCF8746a.jpg
    DSCF8746a.jpg
    103.8 KB · Views: 25
  • DSCF8746b.jpg
    DSCF8746b.jpg
    71 KB · Views: 23

Revell-Fan

Co-Administrator
Staff member
Administrator
Moderator
Aug 1, 2009
11,595
12,338
228
Vreden
Then cut out the outer shell of the upper arm. The little box has to be inserted into the shell, so keep in mind to leave at least one side of the shell open when you assemble it. Take a look at the pictures.
 

Attachments

  • DSCF8747.jpg
    DSCF8747.jpg
    101.5 KB · Views: 19
  • DSCF8748.jpg
    DSCF8748.jpg
    78.4 KB · Views: 21
  • DSCF8754.jpg
    DSCF8754.jpg
    86.3 KB · Views: 22
  • DSCF8756.jpg
    DSCF8756.jpg
    83 KB · Views: 24
  • DSCF8757.jpg
    DSCF8757.jpg
    84.1 KB · Views: 21
  • DSCF8758.jpg
    DSCF8758.jpg
    69.5 KB · Views: 19

Revell-Fan

Co-Administrator
Staff member
Administrator
Moderator
Aug 1, 2009
11,595
12,338
228
Vreden
Then comes the upper arm joint. It consists of two tubes which are pushed inside each other as shown. It is easier to slightly roll the small tube when you push it through the holes.
 

Attachments

  • DSCF8759.jpg
    DSCF8759.jpg
    85.1 KB · Views: 21
  • DSCF8760.jpg
    DSCF8760.jpg
    107.3 KB · Views: 20
  • DSCF8761.jpg
    DSCF8761.jpg
    93.4 KB · Views: 21

Revell-Fan

Co-Administrator
Staff member
Administrator
Moderator
Aug 1, 2009
11,595
12,338
228
Vreden
Attaching the lower arm joint requires a rod, shashlik stick or tooth pick. The elbow box features two small holes which have to be aligned with the holes in the upper arm box tube so that a connecting tube can be pushed through them. Push the rod through the holes and pull the (upper arm) tube a bit downwards so that all holes are aligned. Then roll and push the (connecting) tube through the holes.
 

Attachments

  • DSCF8762.jpg
    DSCF8762.jpg
    98.4 KB · Views: 26
  • DSCF8763.jpg
    DSCF8763.jpg
    90.4 KB · Views: 26

Revell-Fan

Co-Administrator
Staff member
Administrator
Moderator
Aug 1, 2009
11,595
12,338
228
Vreden
A little note concerning the shoulder protector: You have to cut two little triangles out to be able to fold it as intended.
 

Attachments

  • DSCF8763a.jpg
    DSCF8763a.jpg
    27.7 KB · Views: 146
  • DSCF8764.JPG
    DSCF8764.JPG
    93.1 KB · Views: 29

Revell-Fan

Co-Administrator
Staff member
Administrator
Moderator
Aug 1, 2009
11,595
12,338
228
Vreden
The lower arm is assembled according to the instructions on Julius' site. However, I made a slight modification: I made two small cuts into the hand protectors so that it can be bent upwards. So I'll be able to replace the standard (straight) hand with the raised (palm up) hand.
 

Attachments

  • DSCF8775.jpg
    DSCF8775.jpg
    115.6 KB · Views: 32
  • DSCF8787.jpg
    DSCF8787.jpg
    75.1 KB · Views: 28
  • DSCF8788.jpg
    DSCF8788.jpg
    81.7 KB · Views: 31
  • DSCF8788a.JPG
    DSCF8788a.JPG
    101.3 KB · Views: 24
  • DSCF8788b.JPG
    DSCF8788b.JPG
    95.8 KB · Views: 28
  • DSCF8790.jpg
    DSCF8790.jpg
    85.4 KB · Views: 21

Revell-Fan

Co-Administrator
Staff member
Administrator
Moderator
Aug 1, 2009
11,595
12,338
228
Vreden
The upper body is now complete and the figure is taking shape. Any visible white edges will be painted later.
 

Attachments

  • DSCF8791.jpg
    DSCF8791.jpg
    103.2 KB · Views: 34
  • DSCF8791a.jpg
    DSCF8791a.jpg
    98.6 KB · Views: 34

Revell-Fan

Co-Administrator
Staff member
Administrator
Moderator
Aug 1, 2009
11,595
12,338
228
Vreden
Hello, Tony!
- "Pepper, do you know where my pants are?"
- "What do you need pants for when you don't have any legs?"
- "Oops... Jarvis, I think we'll have to build something..!"
 

Attachments

  • DSCF8791b.jpg
    DSCF8791b.jpg
    99.2 KB · Views: 31
  • Like
Reactions: walid009

Rhaven Blaack

!!!THE MAN BEHIND THE CURTAIN!!!
Staff member
Administrator
Moderator
Jun 12, 2009
12,493
9,857
228
Oregon
www.deviantart.com
This is really coming together beautifully.
As with all of your previous threads, this is very informative.
I will have to try my hand at this model sometime.

Keep up the GREAT work!!!
 

Revell-Fan

Co-Administrator
Staff member
Administrator
Moderator
Aug 1, 2009
11,595
12,338
228
Vreden
Hip, hip hooray!

Now here comes the hip and pelvis and we start with a big mistake in the plans. The two balls which hold the upper legs in place do not have any flaps where they connect to the main tube penetrating the pelvis. You have to add them yourselves BEFORE cutting the parts out. The picture shows how they should look like.
 

Attachments

  • DSCF8804.JPG
    DSCF8804.JPG
    142.6 KB · Views: 23
  • DSCF8805.JPG
    DSCF8805.JPG
    128 KB · Views: 22