

Catapult from MechWarrior
- Thread starter leofirebrand
- Start date
You are using an out of date browser. It may not display this or other websites correctly.
You should upgrade or use an alternative browser.
You should upgrade or use an alternative browser.

Awsome... They look perfectly the same..
Ah for the paintjob can you do a step by step howto incl some pictures?.
one day in the future i need to paint some models and i really don't know how to do it right, i still have to find out. and search the web..
Ah for the paintjob can you do a step by step howto incl some pictures?.
one day in the future i need to paint some models and i really don't know how to do it right, i still have to find out. and search the web..
I will make sure and take a bunch of painting pics and do a write up. Most of the techniques I use are the same as what you use for pewter miniatures. I have some sites I go to for tutorials and I will post them later. Also if you have access to reaper paints and want the exact paints I used on my ywing let me know.
Awsome... They look perfectly the same..
Ah for the paintjob can you do a step by step howto incl some pictures?.
one day in the future i need to paint some models and i really don't know how to do it right, i still have to find out. and search the web..
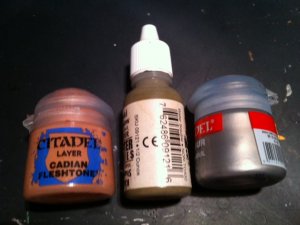
Some progress updates today. I got the base coat down and I am beginning the weathering process. Also here is a website where I learned many of my painting techniques. http://blog.brushthralls.com/. It is for pewter minatures but many of the techniques cary over to scale models.
I'm trying to avoid double posting images so I will reference the photos attached from top to bottom.
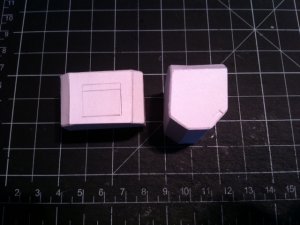
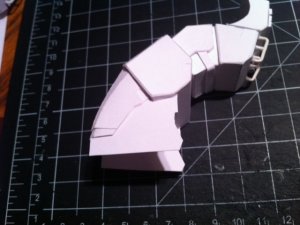
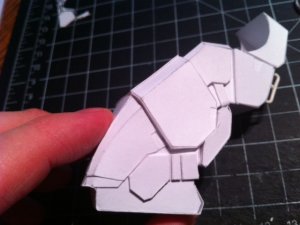
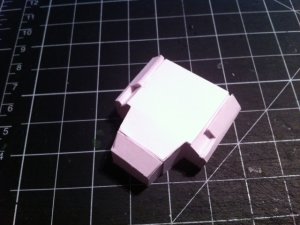
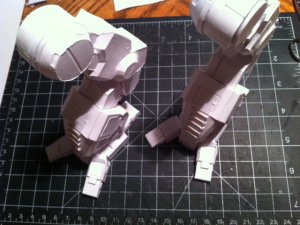
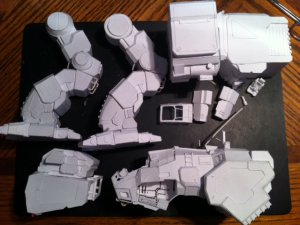
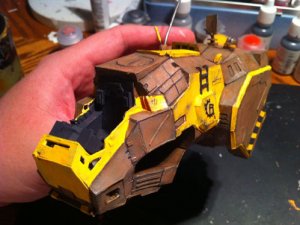
The first picture is all the completed parts laid out on my workbench. This is always my favorite picture in a build as I can finally see the whole model.
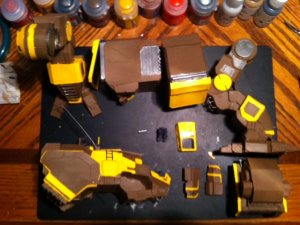
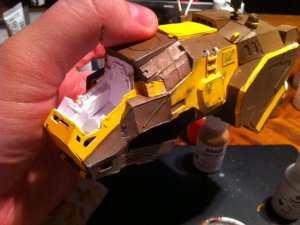
The next Picture is my least favorite picture in a build. The base coat always makes me worried I ruined the model because everything looks so bad without weathering. In this case my model looks like it's made of chocolate. typically I base coat based on the percieved color. For instance, when we look at a person we considerthem to be one color but in reality there are 100s of subtle color variations so you have to base the model in what color we percieve it to be and use additional coloring to make it look like it really does. When the percieved color is light like the yellow I tend to start with the lightest color and darken it, while with darker colors like the brown I like to start with a dark color and lighten it up.
Next I determined what paints to use to weather the brown areas so I can make it look like we actually see. Looking at the concept art I determined that the brown areas have alot of tan accents, with a hint a olive green, and then aluminum where the paint has rubbed of and the metal is showing. If you can't do this by eye you can use the color picker tool in a paint program to help you scan the image and get an idea of the color ranges.
Next I did a test weathering on the left front side of the body to make sure my assumptions where correct. I still need to darken the panel lines and add detail but I am happy with the color comparison to the concept art.
The last photo shows me starting the weathering on the rest of the model. I started with the tan color as it will cover a large amount of the surface of the model. I dry brushed the tan color on using almost no paint on the brush as this will hide the brush stoke better on the larger areas. You can see the before (right) and after (left) below on the missle pods.
I'm trying to avoid double posting images so I will reference the photos attached from top to bottom.
The first picture is all the completed parts laid out on my workbench. This is always my favorite picture in a build as I can finally see the whole model.
The next Picture is my least favorite picture in a build. The base coat always makes me worried I ruined the model because everything looks so bad without weathering. In this case my model looks like it's made of chocolate. typically I base coat based on the percieved color. For instance, when we look at a person we considerthem to be one color but in reality there are 100s of subtle color variations so you have to base the model in what color we percieve it to be and use additional coloring to make it look like it really does. When the percieved color is light like the yellow I tend to start with the lightest color and darken it, while with darker colors like the brown I like to start with a dark color and lighten it up.
Next I determined what paints to use to weather the brown areas so I can make it look like we actually see. Looking at the concept art I determined that the brown areas have alot of tan accents, with a hint a olive green, and then aluminum where the paint has rubbed of and the metal is showing. If you can't do this by eye you can use the color picker tool in a paint program to help you scan the image and get an idea of the color ranges.
Next I did a test weathering on the left front side of the body to make sure my assumptions where correct. I still need to darken the panel lines and add detail but I am happy with the color comparison to the concept art.
The last photo shows me starting the weathering on the rest of the model. I started with the tan color as it will cover a large amount of the surface of the model. I dry brushed the tan color on using almost no paint on the brush as this will hide the brush stoke better on the larger areas. You can see the before (right) and after (left) below on the missle pods.
Attachments
Stunning. Fantastic. Utterly amazing. You have a gift, that is certain. Your pile of parts look so close to the game model, it is eerie. Also, I don't know if it is the angle of the shots, your clear talent, or what, but those pieces almost look like cast polystyrene laying there.
E
ekuth
I made a good deal of progress last night.
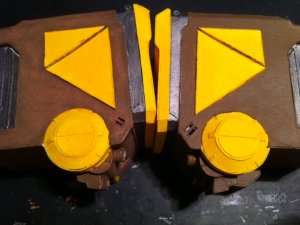
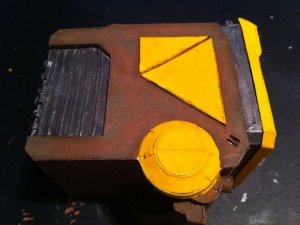
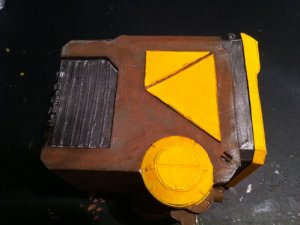
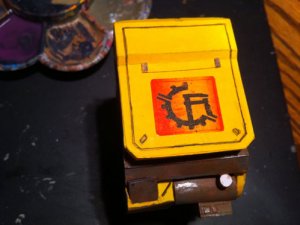
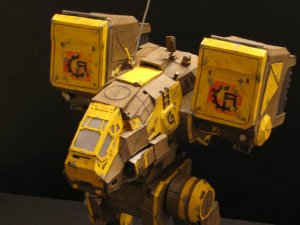
Pic 1: Recently I came accross some water slide decal paper you can use in an inkjet printer. You just spray it with a clear coat and it works just like ones that come with a model kit. Since this model had a lot of very detailed and small logos on it I decided to try them out. You can see them in the first picture. I decided to use my website's logo instead of the one in the concept art.
Pic 2: Next I did a light bit of drybrushing with the olive green. It may be hard to see in the photo.
Pic 3: I then added on the metal weathering.
Pic 4: After all this, the weathering tends to be a little to much in some places so I went back and touched everything up.
Pic 5: I then used a watered down graphite color to bring out the panel lines and make them look grimey.
Pic 6: I started weathering the yellow by dry brushing a mix of the yellow and white and also some tan highlights. It might be hard to see that in these photo since the light is so bright.
Attachments


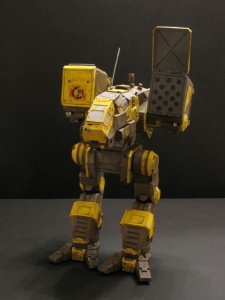
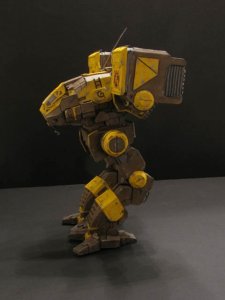
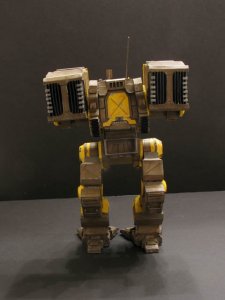
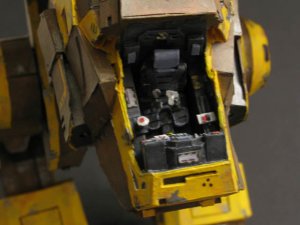
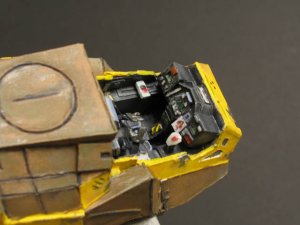
Well after a late night last night I finished the Catapult. After all the weathering I went back and painted all the little small details on the model. I am especially happy with how the cockpit turned out. I even photoshoped in small decals like warnings, computer screens, and a pinup picture on the dashboard. Hope you like it. You can find all 95 images include 30 final pics and 65 making of pics on my website:
http://www.firebrandcreations.net/Papercraft/Catapult/Catapult.htm
http://www.firebrandcreations.net/Papercraft/Catapult/Catapult.htm
Attachments
Really, all I can truly say is WOW!!!
You did a PHENAMINAL job on this model.
The weathering looks GREAT!!!
I like how you added your personal logo to it.
KUDOS to you on a FINE JOB WELL DONE!
You did a PHENAMINAL job on this model.
The weathering looks GREAT!!!
I like how you added your personal logo to it.
KUDOS to you on a FINE JOB WELL DONE!
")
This is great...
I'm thinking what else i can say but i don't have words for this.
It's just great
one well build model...and painted also.
Any ideas about a next model
Congratulations on the model, it's an amazing build, wonderful to follow your process and the end result is spectacular!
Thanks for all the kind words, as far as my next model I am still debating that. I am still kinda in Mechwarrior mode and have debated building another mech or maybe making another Star Wars model. I have also been considering building the nostromo from Alien for a while but the ammount of greebling on that would surpass even my Y-Wing...so I may wait a little longer on that and build something simpler.
star wars always good
or a amp-suit from avatar also nice and looks a little like a mechwarrior.
But whatever you choose..it's going to be a great build..
always good or a amp-suit from avatar also nice and looks a little like a mechwarrior.
But whatever you choose..it's going to be a great build..
Fantastic model build. The cockpit came out great, especially being painted after it was installed in the cockpit tub. The weathering is also top notch. Kudos on a well built model. Waiting to see your next project. Enjoy and se you around the forum.
I am really thinking about building the Atlas next. I am trying to get reference and materials together now to see if it's even viable. The bigest hurdle is his round dome head. I may just have to use a ping pong ball or plastic putty. Though the biggest hurdle is the orhtographics were a huge reason the catapult was so doable. We will have to see. I will of course start a build thread if/when the time comes.
With the considerable assistance of Blaar I am now able to yank whole models from the MWO client and convert them into Blender format. I can get Ortho Images (or focus images for specific areas) for you, if you would like, or even the direct model.
Send me a PM to let me know and I can try to tackle that as early as tonight. I have the Cat already imported for review (it is in a horrible, horrible state for conversion to paper as is, sadly).
Tirick
Send me a PM to let me know and I can try to tackle that as early as tonight. I have the Cat already imported for review (it is in a horrible, horrible state for conversion to paper as is, sadly).
Tirick