USS Selfridge DD 357 1/200 Scale

treadhead1952

Member
Mar 22, 2009
181
1
16
Las Vegas, NV USA
Hi All,

Since I am winding down the current build of one ship model it is time to get underway with the next one. I have chosen the USS Selfridge DD 357, a Porter Class Destroyer. She was laid down in the New York Shipbuilding Yard at Camden, NJ, December 18,1933; the same day and place as the USS Porter, the class leader. Rather than go into her rather extensive service record, I will just direct you to her Wikipedia entry here:

http://en.wikipedia.org/wiki/USS_Selfridge_(DD-357)

Needless to say, she had a full career during the war years and her short life of just 14 years. Like all the other ships of her time she had several paint jobs as various posts and duties came to her. I am using GreMir Models kit number 027 to build her; she is shown in her 4 tone grey/blue wartime camouflage scheme after her rebuilding in 1944. The kit contains a brief history of the ship, 14 pages of photos of the model as built to help reference parts placement, an overall two view General Plan, 7 pages of assembly diagrams, a Templates page and 12 sheets of parts. The assembly diagrams are pictograph style with the numbered parts shown broken down into the steps to construct the ship from building the hull framework on. This is not a beginners' kit more of a medium level of complexity with the number of parts concerned.

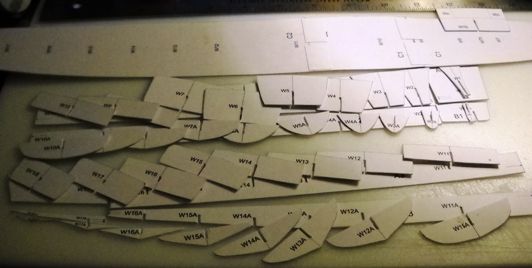
The first three pages are the framework of the hull. As with most ship kits the first step after printing the sheets out is laminating them up to a certain thickness to offer the required stiffness to support all the rest of the parts to follow. I used 110 pound bright white card stock from Office Max to print the parts out on for this important first step. Laminating them to two more sheets of the same card stock gives me .028" thickness. I used 3M Super 77 spray adhesive to glue the sheets to one another, pressed them over night under the weight of a few rather fat heavy books to dry. The next morning I cut the parts free from the sheets.

EmUSSSelfridge_0001_zps4611a281.jpg


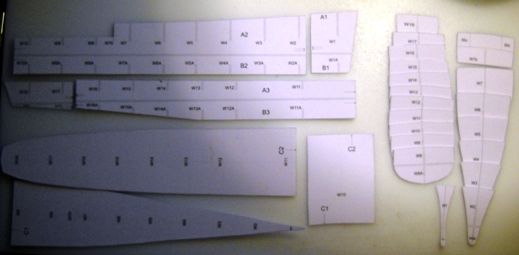
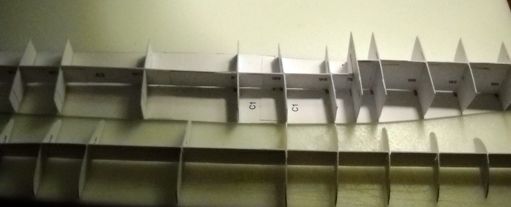
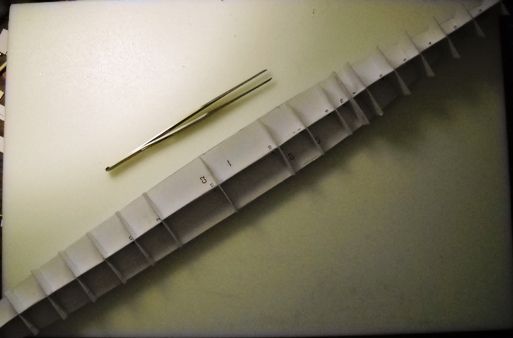
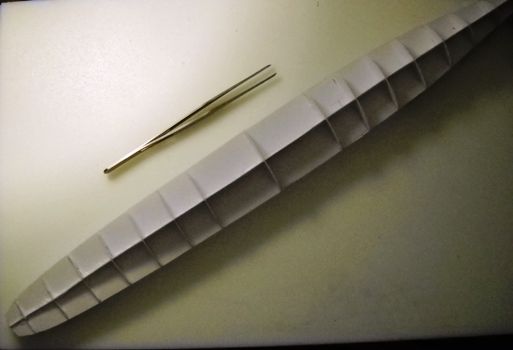
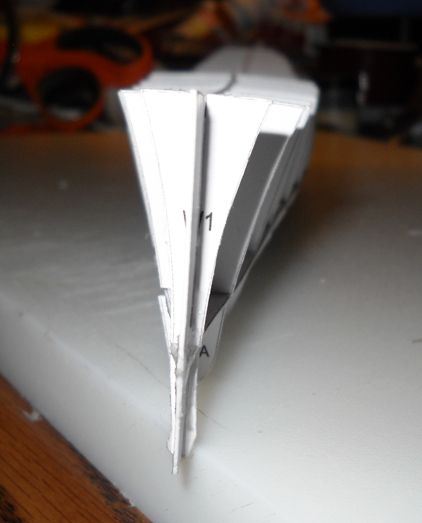
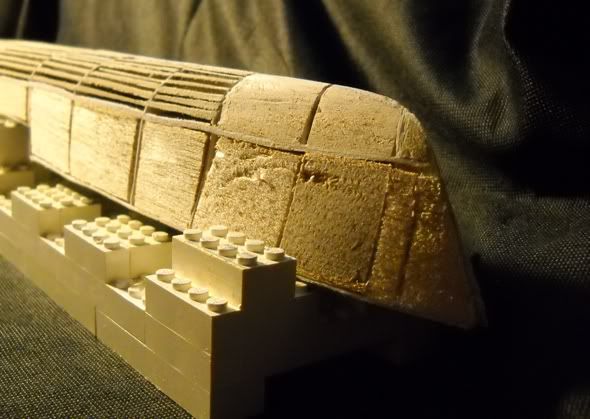
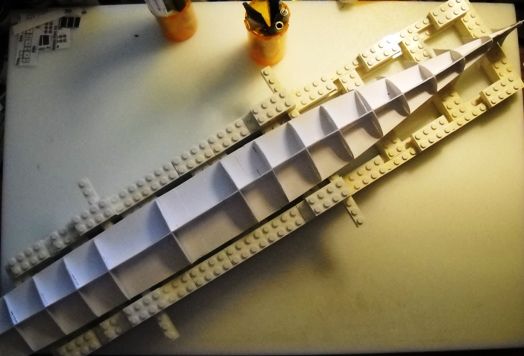
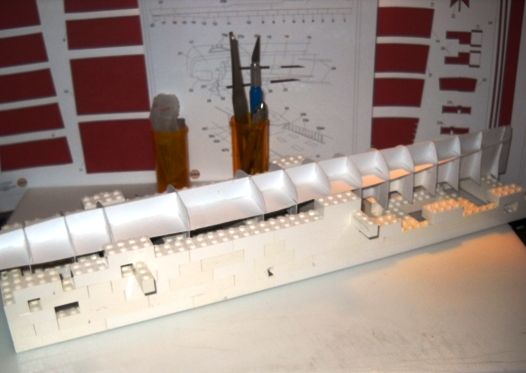
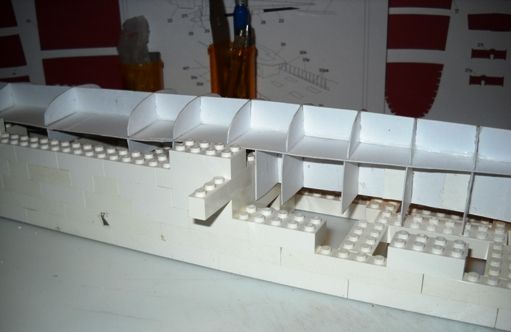
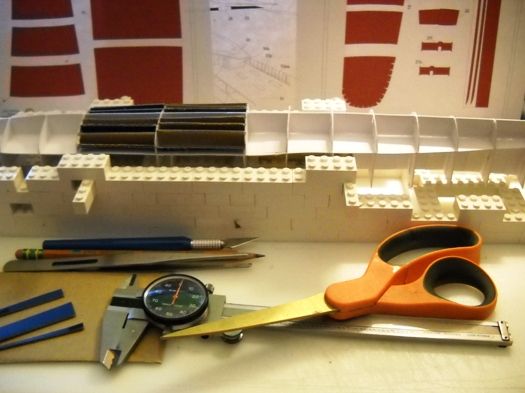
As you can see from the parts there is further cutting to be done before assembly can start. The vertical long hull shapes are cut in half lengthwise to enable one to make either a full hull or waterline build. Since a rather nice base assembly is also included as with all GreMir Models, I will be building the full hull version. Then the section places are trimmed to let you fit each item together. Each of the compartment sections are also cut apart, upper and lower then further trimmed out with their respective slots that fit together with the lengthwise hull forms. Once the upper and lower sections are assembled and joined together they can be glued to the horizontal lenthwise form. Length overall is around 22 and 1/4 inches.
 
Z

Zathros

This is THE quintessential destroyer in my minds eye! Beautiful!

Would you post a direct link to GREMIR's site on this one, so people will know whee to get it? Thanks!! :)
 

treadhead1952

Member
Mar 22, 2009
181
1
16
Las Vegas, NV USA
Hi Zathros,

Sure can :

http://www.gremirmodels.com/uss_selfridge.htm

Between what is available in my chosen ship modeling scale of 1/200, this one, the Fletcher Class, the Wickes Class (USS Ward) and the Gearing Class are the four that are available that I know of from the WWII period from the US. There are a number of IJN Destroyer Classes available, a number of the Royal Navy Classes, a few Italian, a few German, and a few Russian of the same time period or ones that served before and during the war. These alone would make a pretty fair collection for display.
 

vbsargent

Member
Apr 16, 2008
175
3
16
MD, USA
Hmmm . . . a Wickes class you say? I am currenly upscaling a Wickes class HMS Campbeltown by JSC from around 1/400 to 1/72 scale to sit opposite a Type VII U-Boat. Who makes this Wickes class destroyer that you mention?
 

treadhead1952

Member
Mar 22, 2009
181
1
16
Las Vegas, NV USA
Hi All,

I finally got all the slicing and dicing done to the vertical long forms and sections so now I can begin to assemble the hull form itself. Taking your time to trim this as closely as you can so you can have a good start to the model is important.

EmUSSSelfridge_0002_zpsbf900f79.jpg


I started with the horizontal long form gluing tabs to the three sections making sure to leave spaces where the vertical long forms and sections were to go. Holding the horizontal form on edge after gluing the tabs to the top face I was able to eyeball where a set of tabs on the bottom needed to be and mark a set of tick marks with a pencil. Gluing them in place made for a single horizontal form that was only as flexible as the three layers of card would be.

Next came tabbing and gluing the vertical long forms in the same manner. Now I was ready to add the bulkhead sections. Like the rest of the assembly these get a couple of tabs to stabize the bulkheads pieces as they dry and strengthen it. Tabbing all these parts helps to interlock them, strengthen it overall and make for a stiff hull form to accept all the other parts that you add to the model.

So far this evening I have managed to get the upper form glued together. Once I get the bottom one together I can add them both to the horizontal form to tie things together.

EmUSSSelfridge_0003_zps548051a4.jpg
 

treadhead1952

Member
Mar 22, 2009
181
1
16
Las Vegas, NV USA
Hmmm . . . a Wickes class you say? I am currenly upscaling a Wickes class HMS Campbeltown by JSC from around 1/400 to 1/72 scale to sit opposite a Type VII U-Boat. Who makes this Wickes class destroyer that you mention?

Hi VB,

Ya' snuck in on me. Actually if you are wanting to build a HMS Campbeltown, you can use the 1/200 scale GPM #309 kit. It is a very nice one like most current GPM kits.
 
Z

Zathros

At those prices, maybe I should start designing some of these babies!! :eek:
 

treadhead1952

Member
Mar 22, 2009
181
1
16
Las Vegas, NV USA
Hi Zathros,

Uh, gee, you mean you aren't yet?:mrgreen:

Just like most things, prices won't be going down. :curse:

That is why I like this place, lots of free kits that folks have generously provided for people to try their hand at to learn on all the way up to some that rival the commercially available ones. With a resource like this, it helps to encourage new folks in this excellent hobby.
 
Z

Zathros

Hi Zathros,

Uh, gee, you mean you aren't yet?:mrgreen:

Just like most things, prices won't be going down. :curse:

That is why I like this place, lots of free kits that folks have generously provided for people to try their hand at to learn on all the way up to some that rival the commercially available ones. With a resource like this, it helps to encourage new folks in this excellent hobby.

I have modeled a couple of ships, I lack the confidence to release any though. Maybe someday. It looks like your off to a great start. Once the formers are straight, the rest will follow. This is such a beauty of a ship. It's the stuff my childhood dreams were made of. It's the shape of a destroyer in my mind! :)
 

treadhead1952

Member
Mar 22, 2009
181
1
16
Las Vegas, NV USA
Thanks Michael and Zathros,

I have managed to get the lower former assembled and attached them both to the horzontal former to make up the hull form. Once I get them to this point I like to let it sit up over night for the glue to get nice and dry. While I have done my best to keep things lined up, I know that it will require a little sanding to fair up the lines before I do more, filling the spaces up, adding the bottom and side plates and deck plates. But it is beginning to look more like what it will be, a ship.

EmUSSSelfridge_0004_zpse0c8ae2d.jpg


EmUSSSelfridge_0005_zps96f4d19a.jpg


EmUSSSelfridge_0006_zpsc52f1f7c.jpg
 
Z

Zathros

Are you going to put the deck on first? It really gives a way of anchoring the formers and can be screwed down into a table for adding the hull sides. I'm sure you have this figured out. :)
 

treadhead1952

Member
Mar 22, 2009
181
1
16
Las Vegas, NV USA
Are you going to put the deck on first? It really gives a way of anchoring the formers and can be screwed down into a table for adding the hull sides. I'm sure you have this figured out. :)

Hi Zathros,

I usually fill the hull form first so that I have a stiffer structure to work with that doesn't get deformed as I tend to handle it quite a bit in building them the way that I do. Once filled in and sanded down I start by adding the bottom "Red Lead" covered plates first. Then comes the sides of the hull and finally the deck plates. As this goes along you will see the method to my madness. Here is a photo from my HMS Savage build showing how I fill the hull form up before plating it over. I also make a Lego stand to "park" the project on to make things easier.

EmHMSSavage015.jpg


Doing it the old way with just wider bulkhead strips over the individual sections before plating left my hulls with places that would get dented in from handling as I worked. That never looked good to me.
 
Z

Zathros

Love the Legos!! What kind of foam are you using? I make ships a little different. I don't do the foam, but I do think you get a truer model shape the way you are doing it. Your method here is really an excellent way, and you always have the option of making a master mold and popping out hulls. Makes it easy to do R/C models. Very cool! :)
 

treadhead1952

Member
Mar 22, 2009
181
1
16
Las Vegas, NV USA
Hi Zathros,

No foam, cardboard strips on the bottom glued in place after trimming to fit and then balsa wood which is easier to sand and you don't get the air bubbles that happen with most foam fillers that I have seen. Another issue with foam is that it sometimes requires some sort of a filler on top of it. I can apply the strips of card over the sections and then add the hull bottom plates, side plates and deck plates.

If I really wanted to make a mold I would just turn to with a couple of layers of gel coat over the hull form. I have an extensive history with fiberglass having worked in the industry in the past, so it holds no mysteries to me.:thumb:
 
Z

Zathros

I too worked with many composites, some quite exotic. I stay away from them now as I worked with them too much if you know what I mean (sensitized). I used to make balsa R/C planes like that. I got Asthma bad one day when stupidly, I did not have an exhaust fan sucking all the dust away. Balsa is amazing stuff. the strength to weight ratio, and it's modulus is amazing. :)
 

treadhead1952

Member
Mar 22, 2009
181
1
16
Las Vegas, NV USA
Hi Zathros,

Oh yeah, I know about getting sensitized to some of that stuff, nothing like a catalyst burn or some of the other stuff that you can get into with modern composites.

I was doing some checking through the threads here in "Ships & Watercraft" and did find that Padre has done a very nice job on the USS Selfridge back around 2007 in a thread here. Surprisingly enough, the photos are still there as well which was a nice little extra.
 

treadhead1952

Member
Mar 22, 2009
181
1
16
Las Vegas, NV USA
Hi All,

Getting back to this one, I built up a sort of dry dock from Lego Bricks to hold the hull form while I add the "stuffing" to it. Using the bricks to more or less follow the contours of the upside down hull for now and support it ensures that it will continue to be straight as it should be.

EmUSSSelfridge_0007_zps61f46a0f.jpg


There is a few inches of the stern that over hangs it as well as about an inch on the bow, but it is supported on the center spine. That takes the weight off of either end.

EmUSSSelfridge_0008_zpsf9fdecb1.jpg


It is more or less held in place by the raised portion of the forward deck area that butts up against the ledge formed in the dry dock. I can move it around on this, work on it, and let the glue dry while it is supported here.

EmUSSSelfridge_0009_zps1801a2a5.jpg


I have used these Legos for a number of years for styrene projects and now on into card modeling so they are quite handy. Later on when I have filled the bottom of the hull form, I will move the bricks around to form a trough that will support the hull from the bottom so I can work on the top side doing much the same thing.
 
Z

Zathros

I have a bureau full of Legos and I tool make good use of them. They are great!:)
 

treadhead1952

Member
Mar 22, 2009
181
1
16
Las Vegas, NV USA
Hi All,

I got started on the Hull stuffin' this afternoon. You can see the basic tools that I use for the job, a pair of dial calipers to measure the spaces with, pencil to mark things off, a pair of scissors and #11 Hobby knife for cutting and trimming duties and a pair of tweezers to hold the pieces when applying a bit of Aleene's Tacky Glue and stuffing them in place. I do try to make things fit as closely as I can but even so, I know that there will be a little more trimming and finally sanding required to adjust everything before I start adding those lovely red lead encrusted plates to the bottom.

EmUSSSelfridge_0010.jpg


I picked this method up from a German forum that I also haunt. Those guys are past masters at building just about anything from card and paper and well worth emulating. If I am stuck on a point, often times digging up a build thread from one of them on the particular model and eyeballing it, translating with Babel Fish and even posting a question or two usually will provide a satisfactory answer.

Surprisingly, they prefer that I just pose my questions in English rather than attempt a butchered up German Babel Fish translation.:yep:

Some day I am gonna actually learn a foreign language just to say that I did.:eek:ops:;-)