Flight conversion for Ton's 1/48th Soyuz

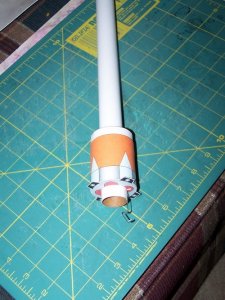
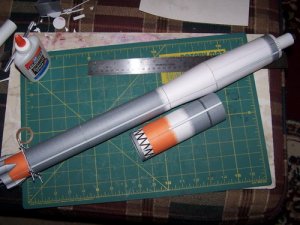
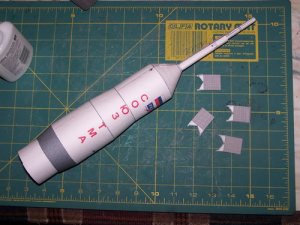
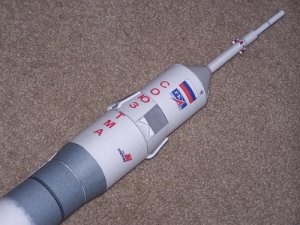
I haven't posted here in some time, so I thought I'd get beack into the forum with the build thread of Ton Noteboom's Soyuz. The model was designed with flight modifications in mind, with provisions for clustered motors, one in the second stage and one more in each of the boosters. In the interest of simplifying what was going to be a complex build in the first place, I decided to go with a single central engine.

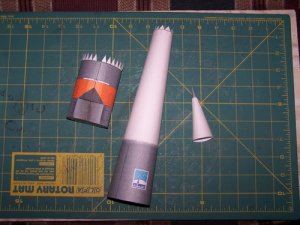
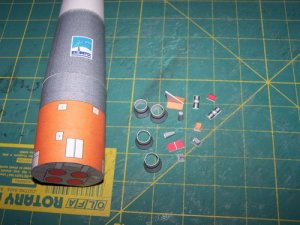
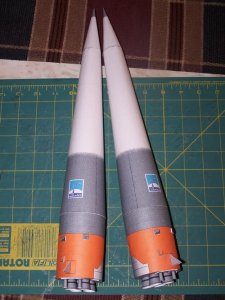
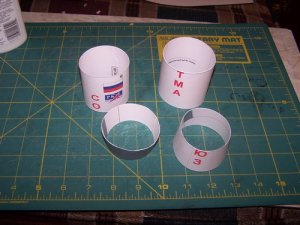
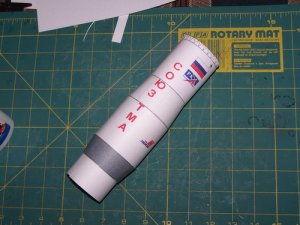
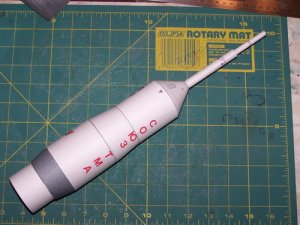
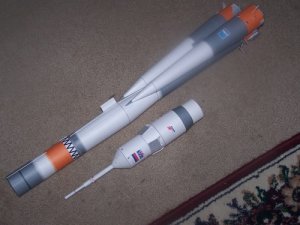
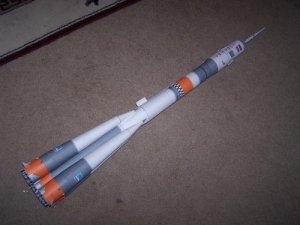
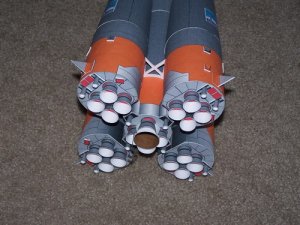
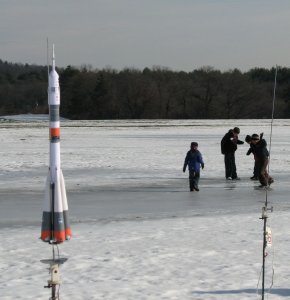
I began by building the boosters. No real complications other than it taking a fair bit of time, as there are four of things to construct. I begin to get the feel for the scale of this bird. It is not a small model.
 

Attachments

  • Booster 1.jpg
    Booster 1.jpg
    69.2 KB · Views: 240
  • Booster 2.jpg
    Booster 2.jpg
    75.3 KB · Views: 229
  • Booster 3.jpg
    Booster 3.jpg
    78.5 KB · Views: 233
  • finished boosters.jpg
    finished boosters.jpg
    101.2 KB · Views: 26
Next comes the second stage stack. A standard model rocket body tube serves as a motor mount/stuffer tube. It runs up the body into the lower section of the interstage. The body of the rocket is double layered 110 lb stock. Centering rings are cut from 4X laminated card stock. In between the stuffer tube and the laminated body, the rocket is remarkably strong. The interstage area will be the parachute compartment.
 

Attachments

  • 2nd Stage base.jpg
    2nd Stage base.jpg
    117.1 KB · Views: 19
  • 2nd Stage web and bits.jpg
    2nd Stage web and bits.jpg
    70.4 KB · Views: 230
  • 2nd Stage transitions.jpg
    2nd Stage transitions.jpg
    76.9 KB · Views: 226
  • Interstage.jpg
    Interstage.jpg
    78.4 KB · Views: 229
The Soyuz cover and capsule will be the nosecone for the rocket. Once again, construction is a double laminate. The capsule carries 3 ounces of weight to bring the center of gravity forward to give a stable flight.
 

Attachments

  • Soyuz cover parts.jpg
    Soyuz cover parts.jpg
    74.9 KB · Views: 226
  • Soyuz cover.jpg
    Soyuz cover.jpg
    73.1 KB · Views: 226
  • Capsule and Escape Tower.jpg
    Capsule and Escape Tower.jpg
    79.2 KB · Views: 231
  • Capsule with grates.jpg
    Capsule with grates.jpg
    77.6 KB · Views: 225
  • assembled nose.jpg
    assembled nose.jpg
    88.8 KB · Views: 230
Now it's just a matter of putting it all together. There's a small alignment tab in the booster web that makes the spacing of the boosters a snap. A few final details are put in place. Two standoffs are affixed with launch lugs and a length of heavy elastic is fastened between the interstage and the capsule. This was built to take a 24mm rocket motor. Final weight of the model is just over 10 ounces.
 

Attachments

  • Final assembly.jpg
    Final assembly.jpg
    65.4 KB · Views: 226
  • All together.jpg
    All together.jpg
    60.5 KB · Views: 231
  • The business end.jpg
    The business end.jpg
    85.3 KB · Views: 225
So far, she has one flight under her belt. She flew on an Estes D12-3 engine. Liftoff was slow and elegant. On this motor she only reached an altitude of 200 feet or so, but it was fine for a first flight. For subsequent flights, I'll use higher powered AP (ammonium perchlorate composite) motors. They'll give quite a bit more altitude. Recovery was on a 24" nylon parachute. It was a very clean flight with no damage on recovery, I'm looking forward to flying her again.
 

Attachments

  • Soyuz on pad.jpg
    Soyuz on pad.jpg
    47.2 KB · Views: 27
  • Soyuz ignition.jpg
    Soyuz ignition.jpg
    46.2 KB · Views: 21
  • Soyuz in flight.jpg
    Soyuz in flight.jpg
    24.1 KB · Views: 23
  • Soyuz flight 2.jpg
    Soyuz flight 2.jpg
    39.6 KB · Views: 21
  • Soyuz safe landing.jpg
    Soyuz safe landing.jpg
    43 KB · Views: 21

WeeVikes

Member
Sep 6, 2007
23
0
16
Miamisburg, Ohio, USA
Blades,

This is beautiful!

One of my favorite things is to do conversions as well, and you certainly have my full attention! I converted Ton's Saturn V into a flier with great results. I also do as you did, use a central core tube for the purpose of using a D12-3. It's simple and works great. I've wanted to build a flying Soyuz for a long time, and this is giving me bad thoughts... :mrgreen:

So, to make sure I have this right, you did not use any clear, auxiliary fins, correct? What did you use for ballast and where exactly did you place it? I assume it more than adequately stable?

I like the idea of the double laminate construction. That never occured to me, but I will certianly give it a lot of thought from now on.

This may have to go on my "must build before spring flying season" list!.

Thanks,


Mike

You are correct, it doesn't need any auxiliary fins. I'd have to run it through some simulation software to be sure, but I suspect that the shape of the boosters effectively make it a cone stabilized rocket. It's draggy, but very stable. I used lead shot mixed with epoxy for the nose weight and put it as far forward in the capsule as I could.

As for the laminated body, I would really recommend it. It adds a great deal of strength. I cut an interior piece the same size as the original, apply a layer of white glue, lay the two pieces together, but offset a bit, to make a glue tab, then roll the assembly under a mandrel to establish the curve. Once it has dried some, I can trim a short length from the glue tab to get a perfect fit and complete the tube. I hit upon this method while working on this rocket and it seems fairly reliable.

I'm currently working on a flight conversion for Ton's Little Joe II. It will also take a 24mm motor. I'll do a thread on it shortly.
 

WeeVikes

Member
Sep 6, 2007
23
0
16
Miamisburg, Ohio, USA
Blades,

I've decided to take one of these on, so I have a couple quick questions for you.

1) How long is the length of BT-50 you used? At what point in the vehicle does it end?

2) You said you added 3 oz of ballast. Was that a combination of the epoxy/shot, or did you weigh out 3 oz of shot, and mix in enough epoxy to work appropriately, and therefore were slightly over 3 oz? (Sorry to be anal about that -- I want to add enough ballast, but only enough.)

Thanks for the inspiration!
 
Always happy to help, WeeVikes. You'll need a section of BT50 22 1/2" long. This will bring your final centering ring about an inch up from the bottom of the interstage tube, giving you plenty of room for a parachute. As for the nose weight, the combination of shot and epoxy came as close to three oz. as I could get it. I used that much weight on the recommendation of another rocketeer who previously had built one. You might be able to get by with less, but as this bird is more about esthetics than altitude, greater stabililty has a higher priority for me.

Have fun with this build. I certainly did.
 

WeeVikes

Member
Sep 6, 2007
23
0
16
Miamisburg, Ohio, USA
Blades,

Another question.

I have my 1st stage boosters built and the second stage well under way. In trying to envision how they fit together, I'm assuming you need to slit the boosters to let the tabs in the support structure fit in them so the boosters snug up against the "latticework" structure. Also, the nose cones of my boosters will not snug up against the fairing of the second stage. Does this sound right to you?

Thanks,


Mike
 

BobH

New Member
Oct 4, 2006
12
0
1
Douglas, Massachusetts
Hi,

I just saw this thread and have also converted Ton's Soyuz for flight.

For what it's worth, I used 3oz of clay ballast in the nose as far forward as possible. It balanced just slightly ahead of the booster tips with an E9-6 installed. The all up finished weight was 8.2oz.

I did not do double thickness on this like I usually do because of the full length stuffer tube (22.25") until I got to the parachute compartment. I made the parachute compartment and everything forward of that double thickness.

Predictions from wRASP was 321 ft on a D12-3 and the first flight was on a D12-3 and maybe it got that high (pictures from winter launch).

The second flight was on an E9-4 (wRASP prediction 562ft) and again nice straight flight but certainly didn't get any higher than predicted. Sorry, no picture from that flight but that will be a good "small field" motor.

Third and subsequent flights have been on Aerotech E18-4 (747ft predicted altitude) and gives a good flight. (summer pictures).

The F24-4 looks like a good motor that will keep it just under 1000ft so I may just try that next if we ever get a day with low enough wind speed.
 

Attachments

  • loading.jpg
    loading.jpg
    113.7 KB · Views: 21
  • IMG_5049.jpg
    IMG_5049.jpg
    102.9 KB · Views: 19
  • Bob_s_Soyuz_lo_1_sm.jpg
    Bob_s_Soyuz_lo_1_sm.jpg
    72.5 KB · Views: 18
  • Bob_s_Soyuz_lo_2_sm.jpg
    Bob_s_Soyuz_lo_2_sm.jpg
    51.8 KB · Views: 16
  • soyuz.jpg
    soyuz.jpg
    50.3 KB · Views: 18