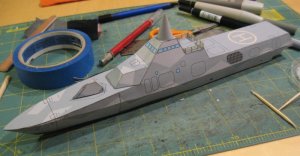
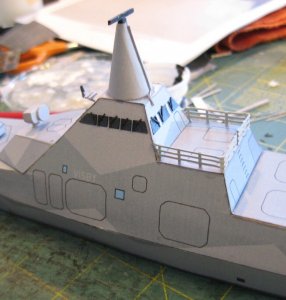
I'm usually a rocket guy, but I decided for a change of pace to try a ship. So here are some work-in-progress photos of my latest, the Swedish stealth corvette Visby. I've only ever before tried one other ship -- Digital Navy's Admirable, which sits in a box, unfinished. And this is my second attempt at Visby, as my first try wound up in the trash because things went horribly wrong along the way.
I chose Zarkov's Visby because I thought it looked cool and figured that since it was a stealth ship and had ultra-clean lines, it would have a low parts count. I foolishly equated "low parts count" with "quick, easy build."
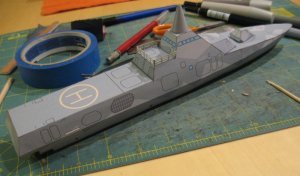
My first attempt was the full-hull model, and after it crashed and burned (or, more appropriately for a ship, burned and sank) I decided to try a waterline model. Zarkov includes a couple of parts to make a waterline model, but he doesn't include any instructions for how to use them, at least that I could find. And since following the instructions led me to ruin on my first attempt, I basically ditched his instructions and built it in the order I thought would make sense.
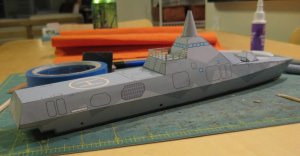
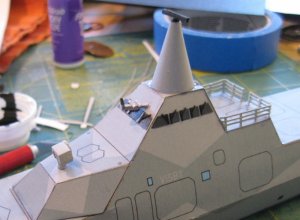
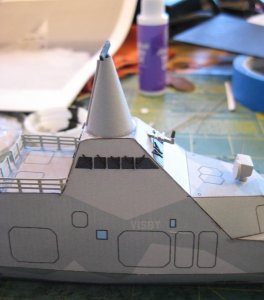
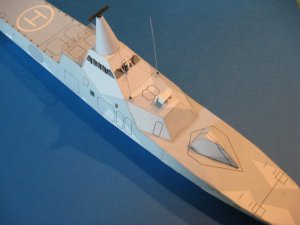
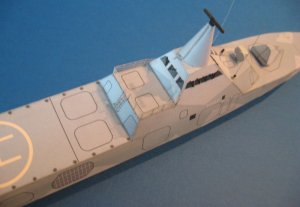
Zarkov's model is from 2004, and Visby have had a few external modifications since then. I'm trying to incorporate them. The most noticeable is the radome atop the superstructure. I made this using a shroud calculator. Fortunately, the prominent seam line you see now will be hidden when I add a cable raceway (I think that's what it is) that appears on the real thing. I have yet to add the rotating radar thingie on top of it. There's also a director I'll scratchbuild and add just forward of the bridge. There aren't too many little bits and pieces because the outside of these ships are kept relatively clean for stealth purposes.
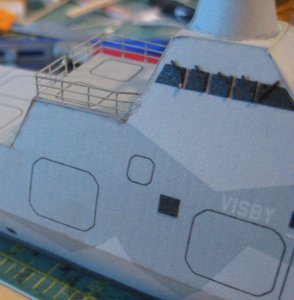
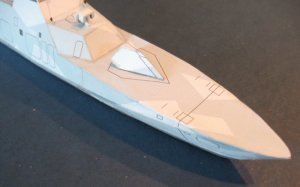
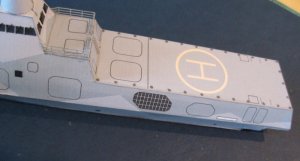
I've seen photos of Visby with safety netting around the flight deck, I've seen photos of the ship with railings around the flight deck and I've seen photos that show nothing around the flight deck. So, for simplicity's sake, I went the latter route.
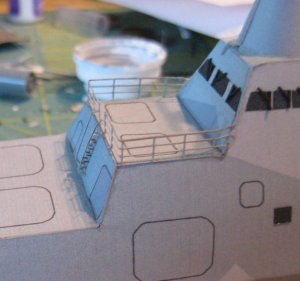
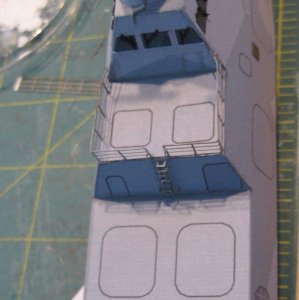
I scratchbuilt the railing that goes just behind the bridge with really thin strips of gray cardstock. Zarkov includes a photo-ready plan if you want to make photo-etched railings and antennas, so I just taped some wax paper over that, laid my strips down atop it and glued the railings on, did some trimming and in a few minutes I had railings.
There are some things I won't be able to fix, though. Visby and her sister ship now have hull numbers, which aren't on Zarkov's model. Also, the front and rear of the bridge each have three windows, not the four that Zarkov has.
I'll post more photos as the situation warrants....
I chose Zarkov's Visby because I thought it looked cool and figured that since it was a stealth ship and had ultra-clean lines, it would have a low parts count. I foolishly equated "low parts count" with "quick, easy build."
My first attempt was the full-hull model, and after it crashed and burned (or, more appropriately for a ship, burned and sank) I decided to try a waterline model. Zarkov includes a couple of parts to make a waterline model, but he doesn't include any instructions for how to use them, at least that I could find. And since following the instructions led me to ruin on my first attempt, I basically ditched his instructions and built it in the order I thought would make sense.
Zarkov's model is from 2004, and Visby have had a few external modifications since then. I'm trying to incorporate them. The most noticeable is the radome atop the superstructure. I made this using a shroud calculator. Fortunately, the prominent seam line you see now will be hidden when I add a cable raceway (I think that's what it is) that appears on the real thing. I have yet to add the rotating radar thingie on top of it. There's also a director I'll scratchbuild and add just forward of the bridge. There aren't too many little bits and pieces because the outside of these ships are kept relatively clean for stealth purposes.
I've seen photos of Visby with safety netting around the flight deck, I've seen photos of the ship with railings around the flight deck and I've seen photos that show nothing around the flight deck. So, for simplicity's sake, I went the latter route.
I scratchbuilt the railing that goes just behind the bridge with really thin strips of gray cardstock. Zarkov includes a photo-ready plan if you want to make photo-etched railings and antennas, so I just taped some wax paper over that, laid my strips down atop it and glued the railings on, did some trimming and in a few minutes I had railings.
There are some things I won't be able to fix, though. Visby and her sister ship now have hull numbers, which aren't on Zarkov's model. Also, the front and rear of the bridge each have three windows, not the four that Zarkov has.
I'll post more photos as the situation warrants....