S
Gundam GP03 Stamen
- Thread starter Master-Bruce
- Start date
You are using an out of date browser. It may not display this or other websites correctly.
You should upgrade or use an alternative browser.
You should upgrade or use an alternative browser.
S
Soaring
^_^ So how far are ya Skip?
In the 4 minutes that elapsed between his last post and yours? I'd bet he's not far at all.
Please try to relax a little, there's no need to reply to every single post... is there?
S
Soaring
Thanks Jaffro, I was starting to smell spam. LOL
Chill a little Soaring, it get's frustrating when people see new posts in a thread only to see that there's nothing new going on, just some posting things like, "I reply quick.".
This thread has been hijacked a few times now by various debates or silliness. I dodn't mind to a point but there are limits.
Ok. I have the first part of the shoulder joint complete.
I decided to write some instruction here to help you guys later on when the model is complete. This isn't an over complicated part but may be tricky to assemble to some. You just need to do it in the right order to make it painless. That's what this post is for.
Cut out these two parts first. Roll up the pin and use plenty of glue as this will help keep the pin solid once it's dry.
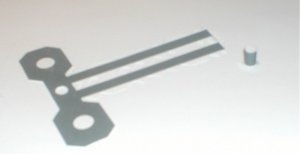
Now, cut out the holes on the main joint part pictured above. Be sure to take your time cuttng, it's a good idea to cut just inside of the hole. Leaving a thing white sline going around the edge of the hole. This will help with a tight fit. Also, if you've cut too small a hole, you can make it bigger by inserting a pen or pencil and turning it in the hole to widen it a bit.
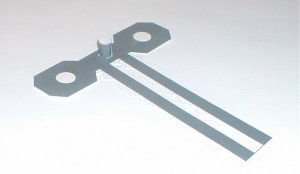
Then insert the pin and open out the tabs and glue into place. Again using alot of glue as it will help keep this part solid later on if you're planning on posing this model later. If these joints will work of course! LOL
You'll have this:
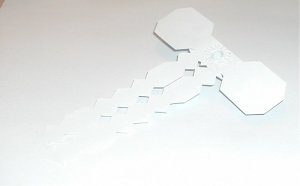
Then continue to score and preshape the part:
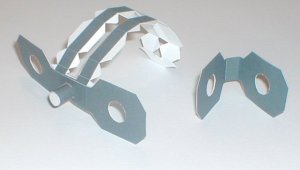
You need to glue in the inner part of this joint first. Start at the bottom and work your way around untill all the edges are fixed in place:
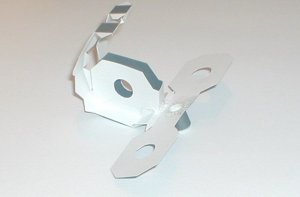
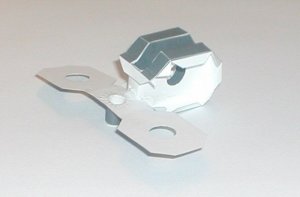
I decided to write some instruction here to help you guys later on when the model is complete. This isn't an over complicated part but may be tricky to assemble to some. You just need to do it in the right order to make it painless. That's what this post is for.
Cut out these two parts first. Roll up the pin and use plenty of glue as this will help keep the pin solid once it's dry.

Now, cut out the holes on the main joint part pictured above. Be sure to take your time cuttng, it's a good idea to cut just inside of the hole. Leaving a thing white sline going around the edge of the hole. This will help with a tight fit. Also, if you've cut too small a hole, you can make it bigger by inserting a pen or pencil and turning it in the hole to widen it a bit.
Then insert the pin and open out the tabs and glue into place. Again using alot of glue as it will help keep this part solid later on if you're planning on posing this model later. If these joints will work of course! LOL
You'll have this:


Then continue to score and preshape the part:

You need to glue in the inner part of this joint first. Start at the bottom and work your way around untill all the edges are fixed in place:


That's the tricky part done. Luckily the size of the joints and the model as a whole makes assembly much easier than if this were say 1/100. 
Now, you need to fold the base part up and glue to the edge. Again, I used lots of glue to ensure strength:
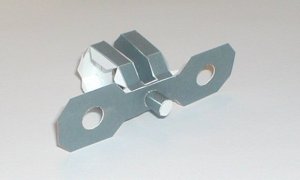
Then it's a simple matter of folding up the outer sides and glueing them in place. Take your time though and all will be well.
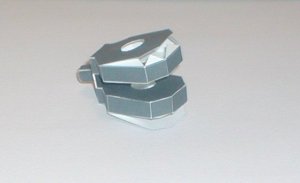
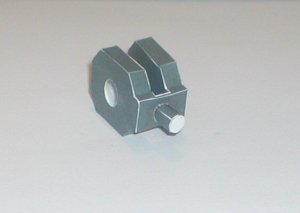
There you have it. This method applies to all of the joints in this model. The opposite male part of the joint is similar in assembly so there should be no need for a guide to assembling that.
Biggest tip is to take your time. You don't want to build this only to be let down by rushed work spoiling what you've done or meaning the joints don't work.
Hell, they may not work anyway at this stage but we'll soon see won't we. LOL
Now, you need to fold the base part up and glue to the edge. Again, I used lots of glue to ensure strength:

Then it's a simple matter of folding up the outer sides and glueing them in place. Take your time though and all will be well.


There you have it. This method applies to all of the joints in this model. The opposite male part of the joint is similar in assembly so there should be no need for a guide to assembling that.
Biggest tip is to take your time. You don't want to build this only to be let down by rushed work spoiling what you've done or meaning the joints don't work.
Hell, they may not work anyway at this stage but we'll soon see won't we. LOL
wow skip its lookign good very clear explanation for thwe joints i should work the idea in principle is sound, keep going man i am paite=ntly waiting for this
Thanks Rob. Just have some house chores to do then I'll complete the joint and we'll have our answer! 
Yeah. With a bit of luck, a working one too!  I'm just building it's counterpart now and I'll have an update.
Thanks for coming here Lex, I know you're an Anime Doll guy more then mech/Gundam. It's nice to see.
Thanks for coming here Lex, I know you're an Anime Doll guy more then mech/Gundam. It's nice to see.
Yea, I mean, I wish to learn from some of the designs here to create a doll with articulated joints... Anyway best of luck on making the joint work! ^^
I hope you fnd something useful here then buddy. 
Another thing to note about the joints. They don't have internal barrels for the holes. They did but I cut them out of the unfolded parts to make them simpler. As a result of this the sides of th joint parts MAY need re-inforcement. For this I just applied a few layers of white glue. Though an second layer of card may be best. Just some scrap cut out and glued to the inside of the sides, then cut out the holes. This should add the strength possibly needed when pushing the pin through.
So far I haven't felt the needfor it but this is just the first joint.
Pics coming soon.
The Joint Works!!!
Great news!!! The joint works perfectly!
Perfectly by my expectations anyway. :mrgreen:
There's one flaw that needs fixing. The pin for the two joint parts is too short but other than that it's all good. I'm now looking forward to building more of the arm to get a real idea of what sort of movement we'll get from it.
My building isn't the best when you fit the joint together. There's slight warping but it doesn't effect the movement.
I suppose you want to see some pics? :twisted:
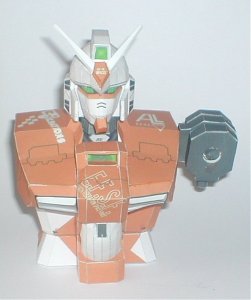
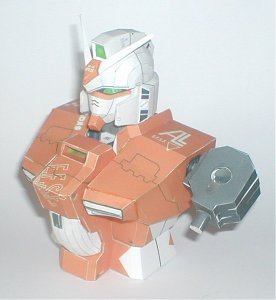
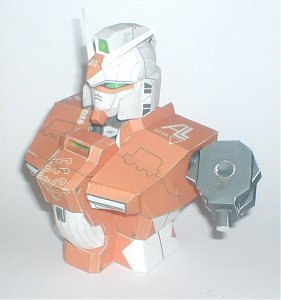
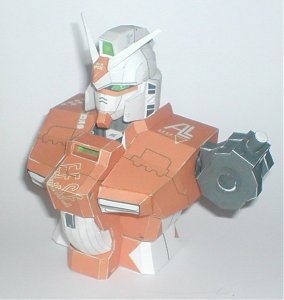
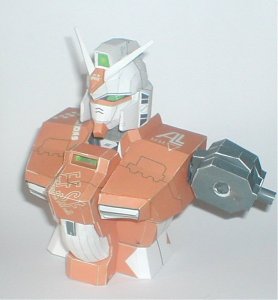
And here's a shot showing the Shoulder armor in place temporarily. You barely see any of that big clunky joint. Not a bad result.
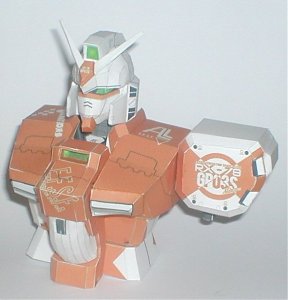
Very happy with that. If you save the pics to your HD, then view them in sequence quickly, it's like aquick animation! WooHoo!
Great news!!! The joint works perfectly!
Perfectly by my expectations anyway. :mrgreen:
There's one flaw that needs fixing. The pin for the two joint parts is too short but other than that it's all good. I'm now looking forward to building more of the arm to get a real idea of what sort of movement we'll get from it.
My building isn't the best when you fit the joint together. There's slight warping but it doesn't effect the movement.
I suppose you want to see some pics? :twisted:


And here's a shot showing the Shoulder armor in place temporarily. You barely see any of that big clunky joint. Not a bad result.

Very happy with that.
Hey that is slick skip...nice piece of engineering...Are you going to try and use the same joint (just beefier I guess) for the legs as well?
I was catching up on this thread this morning...and I have only one thing to say...
Best not to think of them as Robots then. They have a pilot inside them, controlling them.
Right on...they are called "mobile suits" after all! :twisted:
I was catching up on this thread this morning...and I have only one thing to say...
Best not to think of them as Robots then. They have a pilot inside them, controlling them.
Right on...they are called "mobile suits" after all! :twisted:
LOL. Yeah kinda explains it all doesn't it.
Thanks for the kind words Taz. I'm really pleased with it. I forgot that there's another part fr that shoulder armor. It's in place now and hides tha joint even more.
Yes, basically, this is the master joint for it all. Hip, elbow, knee, wrist... You name it they're all variats of this type of joint. The hip is exactly the same I think. Maybe a little bigger.
S
Soaring
It moves because the shoulder is glued to the joint pin. The joint pin is glued to the joint that connects to the arm. The pin is free moving at the centre. So when you position the arm the shoulder moves with the arm.
Forgive me if you don't get what I'm saying here. It all makessense in my mind but I have trouble explaining things in words.
Forgive me if you don't get what I'm saying here. It all makessense in my mind but I have trouble explaining things in words.

