After the last build debacle heres my Sand Crawler progress

Jadriancz

Active Member
Apr 9, 2016
127
113
40
Colorado
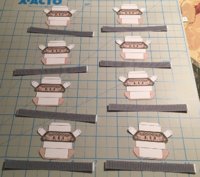
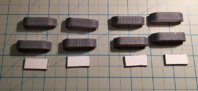
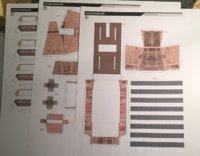
Printed out the pages on A4 cardstock
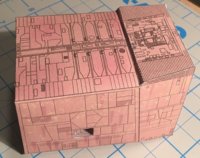
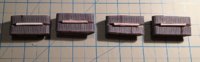
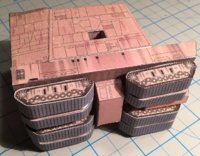
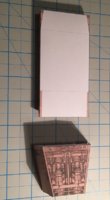
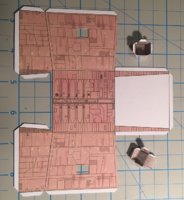
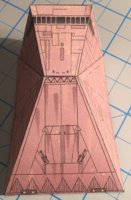
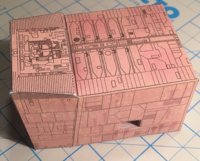
Built the lower body
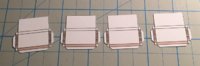
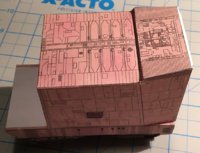
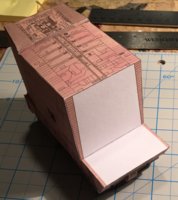
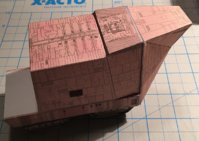
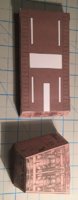
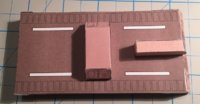
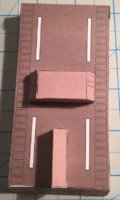
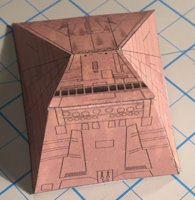
connected 2 of the 3 upper body parts
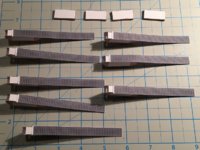
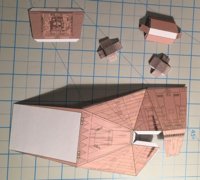
 

Attachments

  • IMG_1003.JPG
    IMG_1003.JPG
    108.5 KB · Views: 15
  • IMG_1004.JPG
    IMG_1004.JPG
    111.8 KB · Views: 14
  • IMG_1005.JPG
    IMG_1005.JPG
    107.2 KB · Views: 15
  • IMG_1006.JPG
    IMG_1006.JPG
    137.8 KB · Views: 16
  • IMG_1007.JPG
    IMG_1007.JPG
    170.5 KB · Views: 15
  • IMG_1008.JPG
    IMG_1008.JPG
    140.1 KB · Views: 15
  • IMG_1009.JPG
    IMG_1009.JPG
    190.8 KB · Views: 15
  • IMG_1010.JPG
    IMG_1010.JPG
    135.2 KB · Views: 15
  • IMG_1011.JPG
    IMG_1011.JPG
    66.9 KB · Views: 16
  • IMG_1012.JPG
    IMG_1012.JPG
    164.2 KB · Views: 16

Jadriancz

Active Member
Apr 9, 2016
127
113
40
Colorado
Tonights progress, I got the tracks completed...
Had to set aside and work on my Lindberg Russian T-80 while letting the glue dry.. Yep the T-80 is Styrene and not paper.. The joys and benefits of multiple hobbies.. :)
 

Attachments

  • IMG_1017.JPG
    IMG_1017.JPG
    185.9 KB · Views: 13
  • IMG_1018.JPG
    IMG_1018.JPG
    128.1 KB · Views: 14
  • IMG_1019.JPG
    IMG_1019.JPG
    79.2 KB · Views: 13

Jadriancz

Active Member
Apr 9, 2016
127
113
40
Colorado
Finally completed... Need to do a few touchups on some of the seams but done..
 

Attachments

  • IMG_1031.JPG
    IMG_1031.JPG
    377.6 KB · Views: 10
  • IMG_1032.JPG
    IMG_1032.JPG
    285.8 KB · Views: 9
  • IMG_1033.JPG
    IMG_1033.JPG
    272.6 KB · Views: 10
  • IMG_1034.JPG
    IMG_1034.JPG
    191.4 KB · Views: 11
  • IMG_1035.JPG
    IMG_1035.JPG
    344.1 KB · Views: 10
  • IMG_1036.JPG
    IMG_1036.JPG
    355.9 KB · Views: 10
  • IMG_1037.JPG
    IMG_1037.JPG
    349.4 KB · Views: 11

zathros

*****SENIOR ADMINISTRATOR*****
Staff member
Administrator
Moderator
Apr 5, 2013
13,498
9,550
228
It's coming out very well. This model can be "bumped out very easily. By taking a close work on how the track assemblies are made. Look at the track detail Pic, all you need to do is double up on the thickness of the tracks. Cut out the Black areas of the track, glue the triangles of the track onto the track. on the inside, double up on the drive wheels, for strength, and for the tracks, just cut on the edges so the look wide enough for the wheels to grab. Cut out rings, and lay them (with glue) over the rings, and cut open the oblong vertical openings. This will bring much life to your model. If you printer on regular printing paper, you can cut out body panels, and glue them onto the body, then instead of a box, it will "POP" to life. This is very easy to do, just takes a little time. Any questions, send me a P.M., to make sure I get it, I'd be more than happy to help you, if you wish. If the model had not come out so nice, I would not have made the suggestions! :)

track detail .jpg sandcrawler .jpg
 

Jadriancz

Active Member
Apr 9, 2016
127
113
40
Colorado
It's coming out very well. This model can be "bumped out very easily. By taking a close work on how the track assemblies are made. Look at the track detail Pic, all you need to do is double up on the thickness of the tracks. Cut out the Black areas of the track, glue the triangles of the track onto the track. on the inside, double up on the drive wheels, for strength, and for the tracks, just cut on the edges so the look wide enough for the wheels to grab. Cut out rings, and lay them (with glue) over the rings, and cut open the oblong vertical openings. This will bring much life to your model. If you printer on regular printing paper, you can cut out body panels, and glue them onto the body, then instead of a box, it will "POP" to life. This is very easy to do, just takes a little time. Any questions, send me a P.M., to make sure I get it, I'd be more than happy to help you, if you wish. If the model had not come out so nice, I would not have made the suggestions! :)

I will keep this in mind for the next time I build this (remember this is only the 5th paper model I have attempted building but only the 3rd completed after the Tie & AT-ST issues)... Will also probably use photo paper instead of regular paper to enhance the details.. Love the coloring on yours thumbsup Do you have any build pics of how the track mounts were done?
The design I used (attached) seems to be a much simpler version of the one pictured above as well.
 

Attachments

  • sand crawler.zip
    1.6 MB · Views: 6

zathros

*****SENIOR ADMINISTRATOR*****
Staff member
Administrator
Moderator
Apr 5, 2013
13,498
9,550
228
You create the way the tracks, "whatever works"! I would advise against Photo quality paper, for many reasons. If you were to print on normal paper, you could glue those on each panel outlined on the crawler. It doesn't matter how few models you have made, this will bring your model to a new level, and once you start adding, it becomes addictive, because the results look so fine , you'll do the whole model, and it will be exceptional. I have the model, and will work on the new pieces tomorrow. You will see, this is an easy "Greebling" project. :) :)
 
  • Like
Reactions: Jadriancz

zathros

*****SENIOR ADMINISTRATOR*****
Staff member
Administrator
Moderator
Apr 5, 2013
13,498
9,550
228
Get the "Bright" paper they sell, didn't forget about the crawler legs. I was able to extract the pages from the .pdf, but don't know if they are in the same scale. Could you measure the over all length of one of your track assembly outside plates, the over all length, to let me know? I need the measurement show like in the pic below:

R1.jpg
 

Jadriancz

Active Member
Apr 9, 2016
127
113
40
Colorado
Get the "Bright" paper they sell, didn't forget about the crawler legs. I was able to extract the pages from the .pdf, but don't know if they are in the same scale. Could you measure the over all length of one of your track assembly outside plates, the over all length, to let me know? I need the measurement show like in the pic below:

View attachment 151000
On my model those are 4cm
 

zathros

*****SENIOR ADMINISTRATOR*****
Staff member
Administrator
Moderator
Apr 5, 2013
13,498
9,550
228
4 cms? Are you sure, that's awfully tiny!?! I extracted the page, you are right, boy that's small. In any event, you could glue these over your existing one. All the doubled parts are to be cut out, and added on top of the parts of the Crawler, to make it "POP". The drive sprockets are NOT supposed to be showing, this is an error on this model, from the drawings I have seen, they look more like this:
Sand Cralwer.jpg


My parts for you, to be printed on letter size paper (U.S.) if you can't get this size paper, let me know, and I will redo it in the size you use, use the extra parts and really make the model pop. :)

SandCrawler New Track Pods.jpg
 

Jadriancz

Active Member
Apr 9, 2016
127
113
40
Colorado
4 cms? Are you sure, that's awfully tiny!?! I extracted the page, you are right, boy that's small. In any event, you could glue these over your existing one. All the doubled parts are to be cut out, and added on top of the parts of the Crawler, to make it "POP". The drive sprockets are NOT supposed to be showing, this is an error on this model, from the drawings I have seen, they look more like this:
View attachment 151058


My parts for you, to be printed on letter size paper (U.S.) if you can't get this size paper, let me know, and I will redo it in the size you use, use the extra parts and really make the model pop. :)
Thanks for the parts.. :)

Is that first picture part of a build-able crawler?? That would be so awesome if it was.